Showing posts with label teaching metal clay. Show all posts

Saturday, February 22, 2014

Another first

Usually when I do a post of one of my classes it's all pictures of the class and the student's work.  For a change I'm going to post pictures of me..... teaching the class. (Thanks to Stacey Brown.)

These were taken when I was demonstrating torch firing (while the kiln was firing the student's pieces.)


Annemarie Blue  also sent me pictures of her pieces.  
(Obviously she is a better photographer than I am.)
She plans on hanging things from the bottoms of her pieces  


Wednesday, September 11, 2013

Family Time

Sometimes a class will go and sometimes it won't.  Luckily this summer was one of the "will goes."

The Oil Valley Center for the Arts scheduled two classes for me this year.  In June I taught an Intro class and in August I taught an applique ring class.  Both classes were filled (plus one more in each) so they were taught in the Art Center's classroom.  

In June there was a mother and son who took the Intro Class.  They returned in August to take the ring class and this time the father and the daughter came too.  Quite often the classes become a family affair.  

The first time I had a family in class, each member got to pick an activity for the month and they all did it.  The father didn't seem too interested at the time, but he later told me that he wasn't a morning person and hadn't had his coffee yet.  All turned out well.

Then for Easter a mother gave her son and daughter a class instead of giving them candy.  She took the class too and they used stones in their pieces that she bought off QVC.

A friend of mine gave her daughter and son-in-law a class as a birthday gift.  Which is what Beth Orris did this summer for her daughters.  

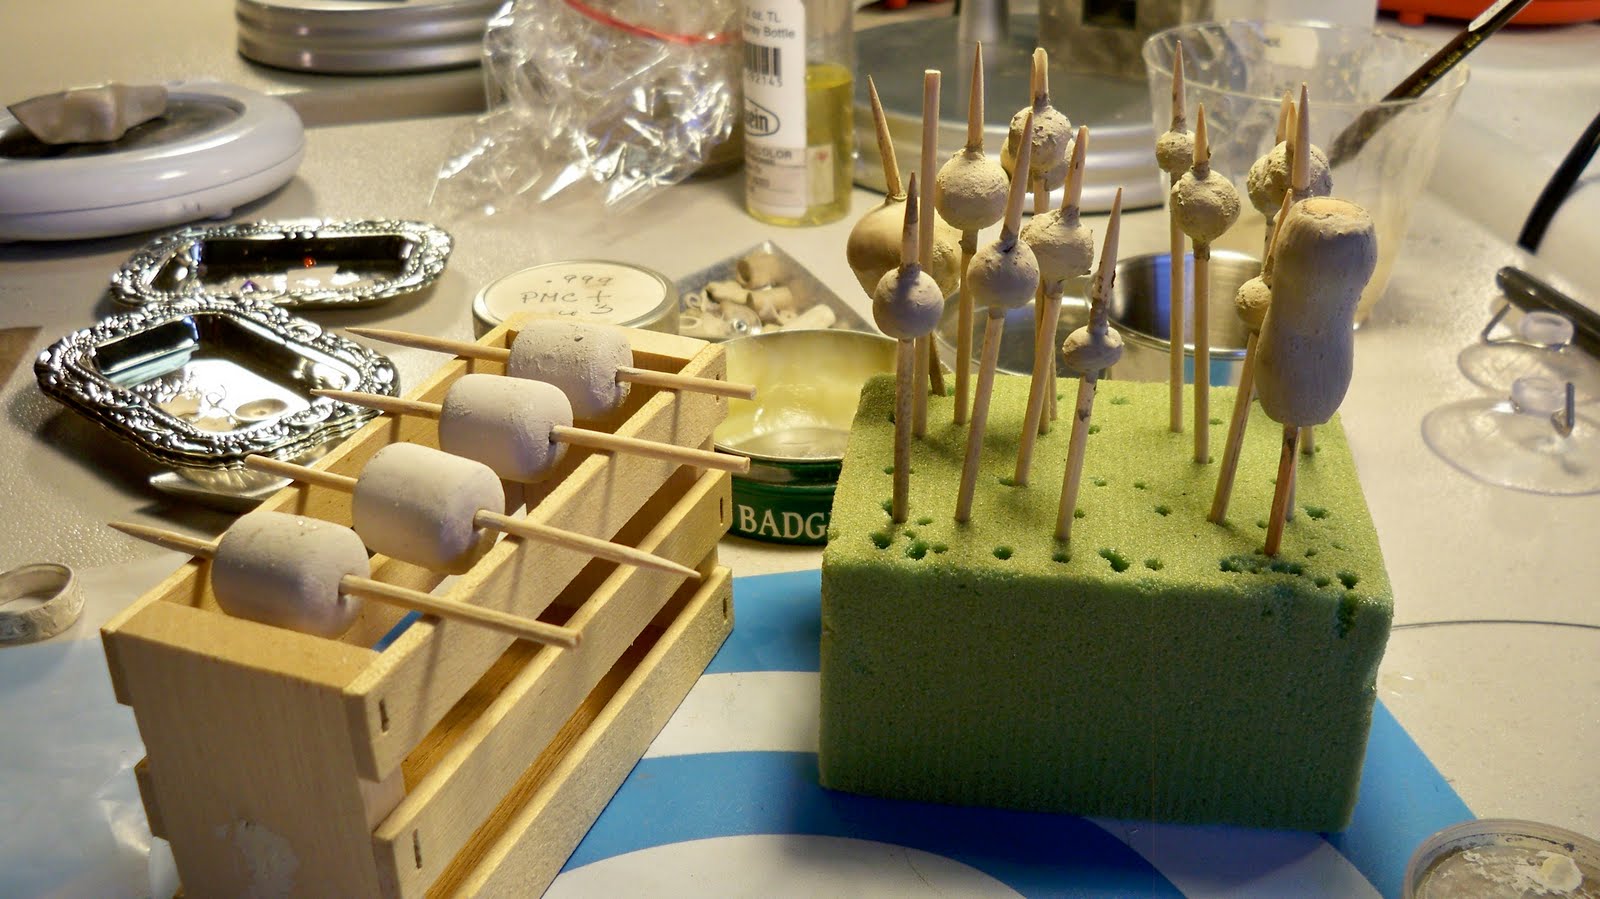
This time I'm not sure what the occasion was, except that the mother and son really enjoyed their first class and wanted the family to share in the experience.  Dr. Brad Fell and family did a great job on their rings.  Having a doctor in the studio came in handy as he was able to use his expertise with tweezers to retrieve a piece from the Liver of Sulfur solution.  (Another lady and I must have tried twenty times.)  Dr. Fell got it out with one try.


Tina and her daughter both made two rings.


Julian appliqued fishbones to his ring.  It appears he has a theme going here as he did a radioactive symbol on his pendant in the Intro Class.


Brad liked the way the patina added a variety of colors to his ring and decided to leave it on, rather than polish the piece.  The colors will eventually turn dark and disappear but for awhile the ring will have a unique color to it.


The daughter carved words into her ring to compliment an existing ring she owned.  


It's fun to teach classes with families.  There is some interesting interactions going on that doesn't happen usually with people who don't know each other.  


Tuesday, July 23, 2013

Demos

Teaching a class obviously requires a demonstration of techniques and how to use the tools.  When doing a demo the teacher has two choices.  Keep the piece and finish it...... or roll it back up into a ball of clay.  Occasionally I've returned the piece to it's original form, but usually I save it and finish it there or later.


Since I've been doing a lot of classes lately I've got a lot of new demo pieces.  Most of the classes have been Intro classes so the demos are very basic.  (I have a ring class coming up the end of August that is already full...... Yay.  That's what I like to hear.)


Fold over bail pendant.  Learning how to work with clay, texture, shape and set a fire able stone.


 Making a Lentil bead.  This class creates a two-sided piece.  One side
uses left-over paper clay.


Using left over clay to make a simple pair of earrings

Saturday, June 29, 2013

Have Kiln..... will travel!

Today I made the trek to the beautiful Tionesta Area.  It's the second time I've taught a class for the Tionesta Area Arts Council.  Class today was held in the visitor center which was just perfect.  The lighting was great and everything was close at hand.  And as usual the people were great.  (I just love teaching and meeting people.  As usual, we had a good time and lots of laughs.)


The focus of the class was making silver lentil beads but of course we made other things too.  (It's amazing how far a nine gram pack of PMC3 can go.)  The above photo is of Denise and Julia showing off their completed beads.  (Sorry I never remember last names....... I'm lucky to remember first names!)


This photo shows one side of Becky's bead (that's the beauty of lentil beads....... they are two sided.)
Becky used some extra clay to make this head from a mold she brought with her.  (It's not yet fired here.)  She is taking it home to add hair and a crown (and do a nose repair.  It got a little flattened.)

Once again the other pictures I took were not good enough to share.  I wish they were, there were so many nice pieces made today.  

I love teaching metal clay, no matter where I go.  But there is a big difference when I'm on the road and when I'm at the studio.  I like to give my students a chance to create using their vision for a piece and try to pack as many different tools as I can.  But invariably someone comes up with a great idea and I have the perfect tool "back at the studio."  Today was no different.  We could have used carving tools, more chains and cords, and more templates among other things.  We make do and figure things out, but having the right tools sure makes it easier.  

What I need is a studio "on wheels!"  Then it can all go with me where ever I go.  


Thursday, February 28, 2013

The Magic of the Trunk

It's been awhile since I taught a class in metal clay, but today that changed.  It was a small intro class..... only two but sometimes those are the nicest ones.


"Hey!  Are you taking my picture?
(That's my friend Helen with the surprised face.)


Both of them were a little hesitant about their skills but as you can see by their finished pieces they didn't need to worry at all.


Helen made earrings and a charm to be finished as an anklet.


Jennifer started with a basic charm, surrounded it with a coil and added three cubic zirconia as an embellishment.


During the creation process it is often common for students to  dislike their pieces.   I've seen this from my high school students.  Holly Gage warns her students that pieces go through an "ugly" stage and not to judge the piece too quickly. 

I think some of this comes from knowing every little flaw and the struggle to make the piece look like their mental vision.   It influences how the piece is perceived.  I use to tell my high school students to put their work away for awhile and not look at it for several days. 

Helen said she had a painting teacher who told them if they didn't like their paintings,  put it in a trunk and leave it for a few days.  She called this "The Magic of the Trunk."  More often than not, it looks much different after you haven't seen it for a few days.    


Tuesday, June 26, 2012

PMC Conference Day 2

Well I'm finally back to posting about the conference sessions.  Friday morning's first session of the day was a trip back in time with Tim McCreight to trace the history of PMC which began in 1995.


The factory where it all began.


Artists meet at Haystack to experiment with this new medium

My first choice of the morning session was "The ABC's of Teaching" with Lora Hart.  Long before the conference, Lora sent out a questionnaire for us to respond to.  My main reason for going to this session was to see what others had to say.  I was an art teacher for 35 years, so basically I felt that there was nothing to learn from this session.  But I was wrong.  Lora brought up some points I hadn't thought of and shared some tips worth trying (like carrying materials for sale in a shoe bag..... multiple pockets and see-through accessibility.)

After lunch I went to see demos by Barbara Becker Simon and Vickie Hallmark who both include glass in their work.  


Barbara's demo included using sheet clay as a bezel with all different kinds of glass and mixing enamel right into metal clay to make colored metal clay.


Vickie showed us how to make a glass cab using a torch and how to work with vitreous enamel in using glass cabs as a canvas for painting.

For the last session of the day I chose "Social Media and your on-line presence" by Susan Dilger.  I had met Susan before (again we were in a class together at PMC Connection's Retreat at Arrowmont in 2009.)  I do use social media (but probably not as much as I should.)  She had lots of information on which site to use for our own specific needs.  For the most part, the theme came through as "If you are not online - you are invisible."  (Those are Susan's words.)  

Now, here is where I should post a picture of Susan making her presentation.  But, instead I am finishing with a picture of her boots.  (The photo came out very dark and I thought it was unusable but thanks to the advanced adjustment tool in IPhoto it is presentable.)  The boots were the first thing I noticed when I sat down.  (How did she get her toes into those upturned pointed toes?)


Tuesday, August 30, 2011

Classy Turtles

One of Gordon's turtles


Gordon's second class at the Cleveland Metal Clay Retreat made fine silver turtle pendants.  Again, I wasn't able to take the class but at least I was able to ooh and aw over the finished pieces of those who did.  There was a story behind the reason for making the turtles but I did not hear what it was.


Patina Turtle belongs to Mary Lou McMullen (on the left)
Silver Turtle is Brenda Kessler's
Both turtles are just gorgeous!

(Another class I wish I'd taken!)


Thursday, May 13, 2010

LOS or not?


LOS stands for Liver of Sulfur which chemically tarnishes silver (called a patina.) It's original form was in lumps, but currently on the market is a liquid LOS and a LOS gel. There are other chemicals like Black Max that also chemically darken silver. Other kinds of metals have their own patinas.

The lump forms break downs very easily if it is exposed to light or dampness. It is very upsetting to open a can of LOS and find it all stuck together. (Can you tell I'm speaking from experience?)

Cool Tools has LOS in a gel form. I used their first gel LOS and it worked great. The newest version is more stabilized and isn't as picky about light and moisture.

LOS is mixed with hot water (and sometimes other chemicals to control it's color). The mixture looks like "pee" and smells like rotten eggs. (The stinky smell is the one constant among all the kinds of LOS.) The silver piece is then dipped into the mixture (but not left laying in the mixture) and watched until it is the color or darkness desired. The silver piece is then neutralized with water or a mixture of baking soda to stop the tarnishing action. The piece is dried and then the LOS is polished off, exposing the high spots. The recessed areas stay dark.

Not all pieces need LOS. Some pieces look better with a matte silver finish. Some look better with a high shine finish and some look better with an antique finish (hence the use of LOS.)

Some artists would never dream of using LOS on any of their pieces and some use it on everything. (I'm somewhere in the middle. I look at the piece and make my decision after everything is done.)

Sometimes I make a bad decision and add a patina, thinking the piece needs it. Whoa..... what a mistake! Not to worry, it can be fired off the piece or the piece can be dipped in silver cleaner. The only problem with the silver cleaner is that the pieces seem to tarnish faster once they have been cleaned.

The students in my last dichroic class all opted to add a patina to their pieces. Good choice as the patina brings out the details of their designs.

Tuesday, April 27, 2010

High Tech


Working with metal clay requires very high tech sophisticated tools. Yeah, right........ they are anything but sophisticated. The clay is rolled out with a PVC pipe between playing cards. Then it is filed with sandpaper and nail files.

The metal clay websites are loaded with all sorts of fancy tools to buy. I've been suckered in on some of them (especially when I was starting out.) But most of them aren't necessary.

I can't take credit for coming up with anything in the tool line. Most metal clay artists (who have been working with the clay for awhile) know about these simple tools. I don't know who came up with some of these (like using playing cards to measure thickness.)

I'll mention just a few here. Like using a box with a hole cut in the top and a hair dryer which is much cheaper than some of the fancy dehydrators.

Metal clay will hold it's shape when dried over a form. A simple form for shaping the clay is a light bulb stuck in a cup or a plastic Easter egg. I've also used paint palettes and a mold for making jellybeans out of gelatin. One of my students draped her butterfly shape between two rubber blocks to give it the effect of flying.

Some sort of handle is needed when making beads or hollow vessels. Toothpicks and party picks come in handy for this, but then something is needed to support the picks while the bead dries. The photo shows a styrofoam cube and a small wooden box being used for support. When I was taking my Certification class, I was desperate to work on some small vessels. But, since we were staying in a hotel I had nothing to work with. The small bar of soap provided by the hotel did the trick. (We had brought our own soap with us. I didn't want you to think we didn't take a bath for the entire three days.)

There are many other simple, everyday items that work well as tools for metal clay. These are just a few. Please feel free to add to the list of "high tech" tools.

Monday, April 26, 2010

There are no mistakes!


There are no mistakes, just learning experiences. But boy am I getting tired of all my learning experiences lately. I had another one during a class that I was teaching. (Thank goodness it was my piece that had the problem and not my student's. )

We were making a ring with a large CZ. Cool Tools had some new stones that were pillow shaped with a checkerboard cut on top. They are really nice and I was liking the look of the large 10 mm stone, although the ring wasn't quite what I had in mind when I started. I wanted a big, long ring and this was becoming more square. But the yellow diamond CZ in the middle was just plain dazzling so I was willing to let my original plan go.

The band was textured and I kept feeling that the top of the ring just didn't go with the texture on the band. I tried several things (to no avail) to make the top and band compliment each other. Even though it just didn't feel right I was going to go with it.

The ring had other ideas. I fired it upside down so the top wouldn't slump like my orange ring. But, the band slid on the ring pellet and was really, really out of whack. To straighten it, I used a rawhide mallet and hammered away at it on my metal ring mandrel. (One of those things I've done before with no problem. Seems like that's happening a lot lately.) Slowly it started to come back into line and then wham.... the top popped off. With a little more hammering, the ring cracked at the seam. When I was pasting the top to the band, I drilled the hole too big. I figured there wasn't enough contact between the band and the top. (Guess I was right.... darn! I hate being right.)

It was one of the cases where I knew there might be a problem, but I was just too lazy to make it right.

Oh well, things are looking up. I've made a new top (which compliments the band and is long and narrow) and the yellow diamond CZ has a new home in a hidden bail pendant. It usually works out and often for the better. This time was no different.

Tomorrow I'll share photos of the new pieces. I like them both better than my original.

Tuesday, April 20, 2010

More Dichroic pendants


I held another dichroic glass pendant class on Sunday. This time I followed the firing schedule suggested to me by Zoe Nelson from North Carolina. I fired the pieces at 1300 degrees for one hour. Thanks Zoe, it worked great.

The student's work is fresh out of the kiln. Mine is the only one finished. After brushing the piece, I decided it looked good with a matte finish.

Teaching is what I know ( thirty five years of teaching is hard to change.) I'm always excited to see the direction my students will take their pieces. Once again I wasn't disappointed.

But, I have to change my intro class. I have so many fold over bail pendants (from demonstrating) that I am getting bored. Time to come up with a new intro project. If mistakes are the mother of invention, then boredom is the mother of change.

Sunday, March 28, 2010

Dichroic glass pendants

Debbie's Pendant

Kate's Pendant

Phil's pendant, fresh out of the kiln

This past weekend, I added a class on dichroic glass pendants to my class schedule. The dichroic glass pieces I've done previously went through the firing with no problems. That wasn't the case this weekend.

The glass fuses to the metal clay at 1470 degrees for 45 minutes. But, that doesn't mean that the glass can just be laid on top of the clay. It needs to be contained by wrapping metal clay around it. Now, I'm not a physicist (I never even took chemistry or physics in high school. Little did I know how much art involves those two sciences.) I'm not exactly sure what the glass does during the firing process, but I imagine that it becomes sort of gelatinous.

When the firing is complete, the door of the kiln must be opened and left open until the internal temperature of the kiln reaches 1,000 degrees. Then the door is closed and left closed until the kiln is back to room temperature. This keeps the glass from turning cloudy which is known as devitrification and also keeps the glass from cooling too quickly and cracking.

Well, let me tell you that I followed the process to the T and still had problems. (Murphy's Law!!) My one piece turned cloudy and my other piece cracked. In fact the glass cab just cracked right off. (Thank goodness for E6000 glue.) Our pieces also looked like the glass was just getting ready to melt. The shape of the glass shifted just a little. Guess it's time to check the temperature of my kiln. (Once I figure out the directions on the set I bought to do just that.)

The good news is that none of my student's pieces turned cloudy or cracked. So, these are the pieces I'm showcasing on this post. I'll show you mine later.

Saturday, January 30, 2010

An end to the color workshop


Finally, this is my last post about the color workshop I took with Tim McCreight. (Well until I add color to a finished piece of jewelry and not these samplers.)

Tim had some unusual media with him for the workshop. One of which was flocking. (Like what use to be on wall paper. When we bought our house, the front room had gold carpet, a fingernail polish pink wall and red and silver flocked wall paper. God, it was awful!) I tried some of the red flocking. It came with an adhesive red paint that was used first; then the flocking was sprinkled on. I hated it! (Almost as much as I hated that wall...... and Tim's example looked really nice.) Anyway, I tried scraping it off before I ended up torching it off (and breathing in all those toxic fumes from the polyester it is made of.) The damn thing would not totally burn off. It just turned black and stuck. So, I ended up scraping it off after all.

I found some flocking in a mini-pack of colors at Michael's. I can't believe I bought it and tried it again. This time I used a plain glue before sprinkling on the flocking. I'm not crazy about it but at least I don't hate it.

Michael's also had some really cool glitter and mini glass marbles. So, of course I tried those too, but just the marbles.) They are really interesting little things. (I like little things. My husband gets mad when I tell people that. I never did go for tall, dark, and handsome. I'd rather have a short and handsome type.)

My main concern with these "kitschy" color mediums is their staying power. I suspect they will fade over a very short time period. Which brings me to my conclusion about using color with the silver.

Which is ...... color for color sake is never good. Color is a design element which needs to work in harmony with the other design elements. It must play an integral part to the total design if it is to succeed. I love the look of silver and the contrast of textures, lights and darks, and positives and negatives. Unless a piece tells me that it "needs" color (remember my jewelry talks to me) I won't be using color arbitrarily any time soon.

At least not in my jewelry. But..... a piece of sculpture could be no holds barred for any form of color media.

Playing with resin, is next on my list. But I'll try it out without using the fine silver.


Friday, December 25, 2009

Christmas from the heart


There have been several students these past months who've been working on Christmas presents.

My most prolific student is Virginia who has been working diligently on her presents for all of her family members since June. She's had her own seat in my studio where she's spent many hours in class, during open studio days and other days. We've become good friends and it will seem strange not to see her during the winter months. (Metal clay has brought me many new friends!)

My cousin's grandson, Ryan, who is ten wanted to make his Mom a necklace for Christmas. (The last time I taught an elementary student was 25 years ago...... not counting my grandson.) So, a week ago he came in after school. He already knew what he wanted, circles and a piece of dichroic glass. He even knew what shape he wanted it to be (a tooth shape. At least that's what it looked like to his Grandma and me.) He drew the shape (I enlarged it to allow for shrinkage) on an index card and cut it out to make a pattern. Ryan rolled it out on a texture plate, traced around the pattern with a needle tool, sanded, and drilled the hole.... all by himself. (This kid was good.) I did enlarge the hole after we decided to hang it with two jump rings and used syringe to circle around the glass. (That syringe is tough, even for an adult!)
After firing (and about 3 hours to let the kiln cool down ...... during which time he did his homework and went for pizza) he brushed it to create a matte finish.

I do have to say that Ryan has been my most exuberant and excited student. He did manage to wait until Christmas to give his mother her present (after threats from his Dad.)

It was fun working with him and so far he is the only one able to avoid the motion detector chime at the door to my studio. The trick is to be young and get a running jump! (There's no way I am even going to try!!!)