Showing posts with label Vickie Hallmark. Show all posts

Thursday, October 4, 2012

Back to Backs

Back in June I wrote a couple of posts about bezel setting stones in metal clay, "The First rule of Soldering" and "Romancing the Stone."

Here it is October fourth and I still haven't done my bezel setting.  (Too much golfing, traveling and watching grandchildren .)  But..... today I finally spent some quality time in the studio and got back to it.

Earlier this year, I designed a piece for one of the triangular stones, the Jasper Mookite.  It was a rather expensive stone (so I'm not sure I should have started with it.)

The second thing I shouldn't have done was pick a setting that required so much precision in the placement of the bezel.......... but I did!  Last June I made the backing and eye-balled the size which was just a hair too small once it shrank in the firing process.  (I know that's not the way to get a good fit but I had a moment of lazy insanity.)  

Sooo....... the piece sat for four months until I got the ambition to work on it again.  This time, I scanned the drawing (it was drawn to fit the stone) and increased the size by 115% to allow for the shrinkage of PMC3.  The original piece was three cards thick which was something else I didn't care for, so the new piece is six cards thick.  The extra thickness gives the piece a nice heft to match the weight of the stone and more area to create a nice beveled edge.  

Today I finally sanded the piece, added the hidden bail and beveled the edges in preparation for firing.  I also made two hallmark pieces to add to the back...... 99.9%FS and my AW.  While trying to figure out where to place the two little pieces on the back, I happened to notice the plate with all my paper clay scraps.  In an earlier post this past summer I talked about the work of Vickie Hallmark and how beautiful the back of the pieces were.  She takes as much care with the back as she does with the front of her pieces.

I always tried to make the backs of my pieces clean and neat but I never really designed the back (unless it was for a reversible piece.)  But today I decided to decorate the back with the left-over pieces of paper clay.  
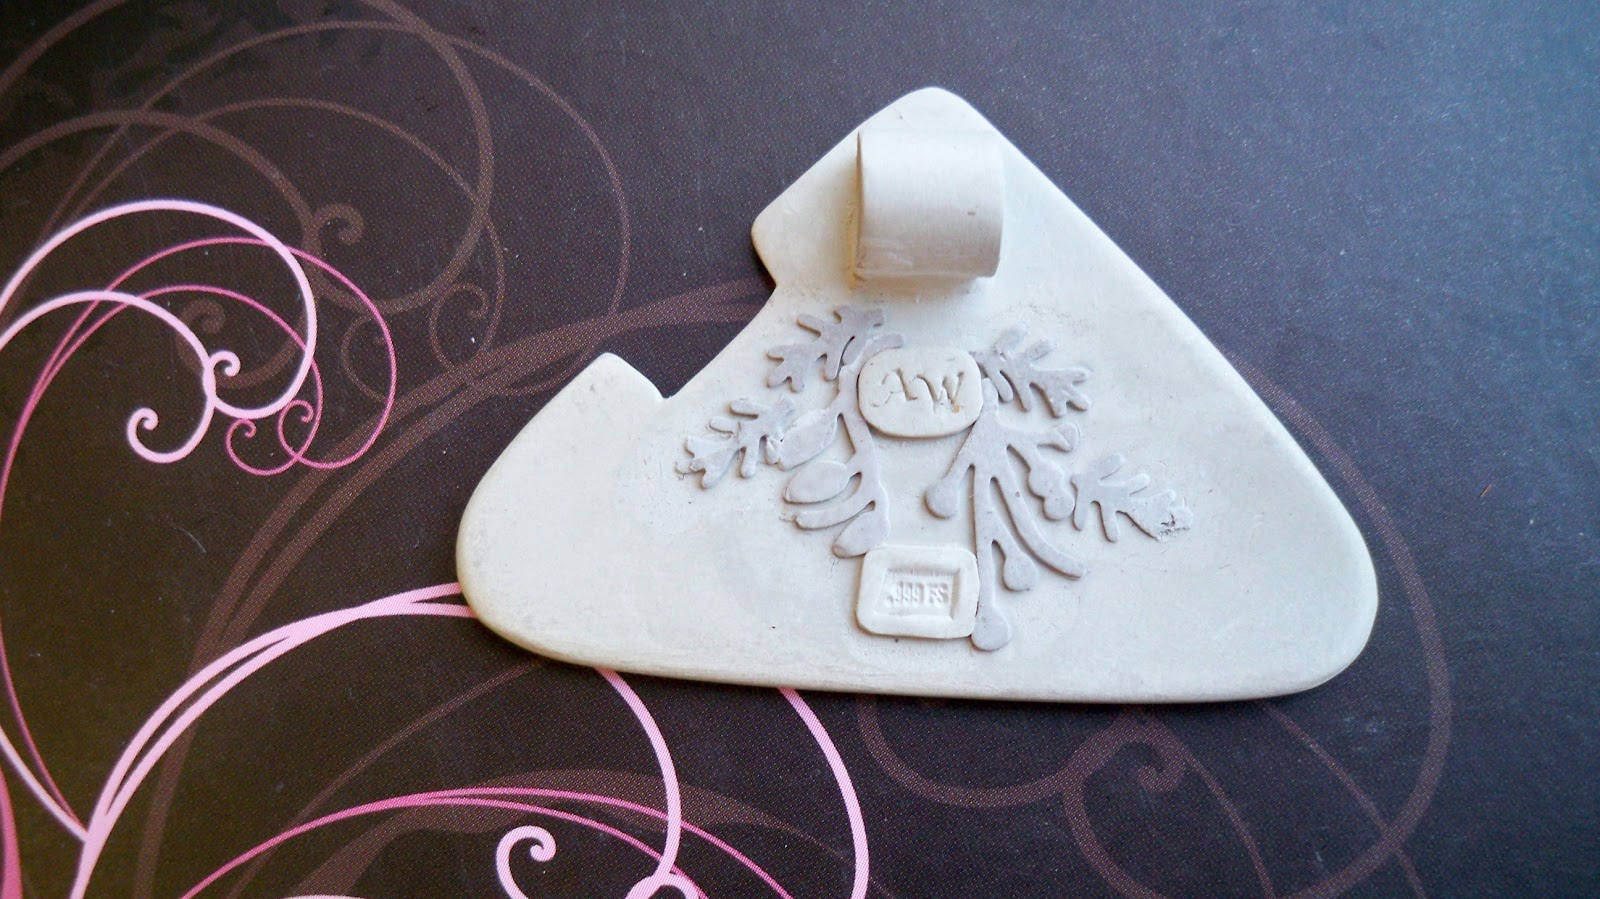

The unfired back.

The piece was fired at 1470 degrees for forty five minutes.  And guess what......... it pretty much shrank to the exact same size as my eye-balled first piece.  Am I good or what?   The thing that isn't good is the fact that my bezel piece barely fits (and I mean barely.)   It's not a whole lot better than it was on the first piece but I think I have it worked out.  

The next step is to join the bezel and the backing piece with oil clay, fire and insert the stone.  I'm getting so close to finishing it (but I've been there before so I'm not holding my breath cause I'll probably pass out.)  


Tuesday, July 3, 2012

Check your behind!

As an art teacher, I always tried to impress on my students to not neglect the back of their art work.  Even though it may not be seen, it was important to follow through on the back with their craftsmanship.

This is something I've tried to attend to in my jewelry making.   Now I'm not talking about making a piece reversible so that there is no back or front.  This in my opinion is getting a "twofer"  (two for the price of one, thus making the piece worth more.  An example of this is "Big Frog in a little Pond."

The original "front"

On the "back" a Koi fish

What I am talking about it taking great care with the back to make it just as interesting as the front, (even if it doesn't get seen.)   I try to keep my backs clean and smooth.  But, after being at the conference, I realized that just isn't enough.   How the back is treated separates the men from the boys (as they say.)

I sat behind a girl at one of the sessions and noticed how nice the back of her earrings looked.  I couldn't see the front of the earrings but the interesting texture on the back intrigued me.

At the "Show and Sell",  Vickie Hallmark's cloud pin http://www.flickr.com/photos/vickiehallmark/ not only had great detail on the front but she also included two cz's at the points where the pin attached to the backing.  (I just couldn't get over how nice it was to see such attention to detail...... even on the back.)

Lisa Barth's book (that I mentioned in a previous post) shows how much time and detail she puts into the backs of her stone settings.  These are not reversible, but the backs are just a lovely as the fronts.

Good art  requires careful designing not only from the front, but from the back also.   

Tuesday, June 26, 2012

PMC Conference Day 2

Well I'm finally back to posting about the conference sessions.  Friday morning's first session of the day was a trip back in time with Tim McCreight to trace the history of PMC which began in 1995.


The factory where it all began.


Artists meet at Haystack to experiment with this new medium

My first choice of the morning session was "The ABC's of Teaching" with Lora Hart.  Long before the conference, Lora sent out a questionnaire for us to respond to.  My main reason for going to this session was to see what others had to say.  I was an art teacher for 35 years, so basically I felt that there was nothing to learn from this session.  But I was wrong.  Lora brought up some points I hadn't thought of and shared some tips worth trying (like carrying materials for sale in a shoe bag..... multiple pockets and see-through accessibility.)

After lunch I went to see demos by Barbara Becker Simon and Vickie Hallmark who both include glass in their work.  


Barbara's demo included using sheet clay as a bezel with all different kinds of glass and mixing enamel right into metal clay to make colored metal clay.


Vickie showed us how to make a glass cab using a torch and how to work with vitreous enamel in using glass cabs as a canvas for painting.

For the last session of the day I chose "Social Media and your on-line presence" by Susan Dilger.  I had met Susan before (again we were in a class together at PMC Connection's Retreat at Arrowmont in 2009.)  I do use social media (but probably not as much as I should.)  She had lots of information on which site to use for our own specific needs.  For the most part, the theme came through as "If you are not online - you are invisible."  (Those are Susan's words.)  

Now, here is where I should post a picture of Susan making her presentation.  But, instead I am finishing with a picture of her boots.  (The photo came out very dark and I thought it was unusable but thanks to the advanced adjustment tool in IPhoto it is presentable.)  The boots were the first thing I noticed when I sat down.  (How did she get her toes into those upturned pointed toes?)