I just finished two commissions back to back and they both were very challenging. The first was to incorporate a "screw" into the piece and I wrote about it two posts ago.
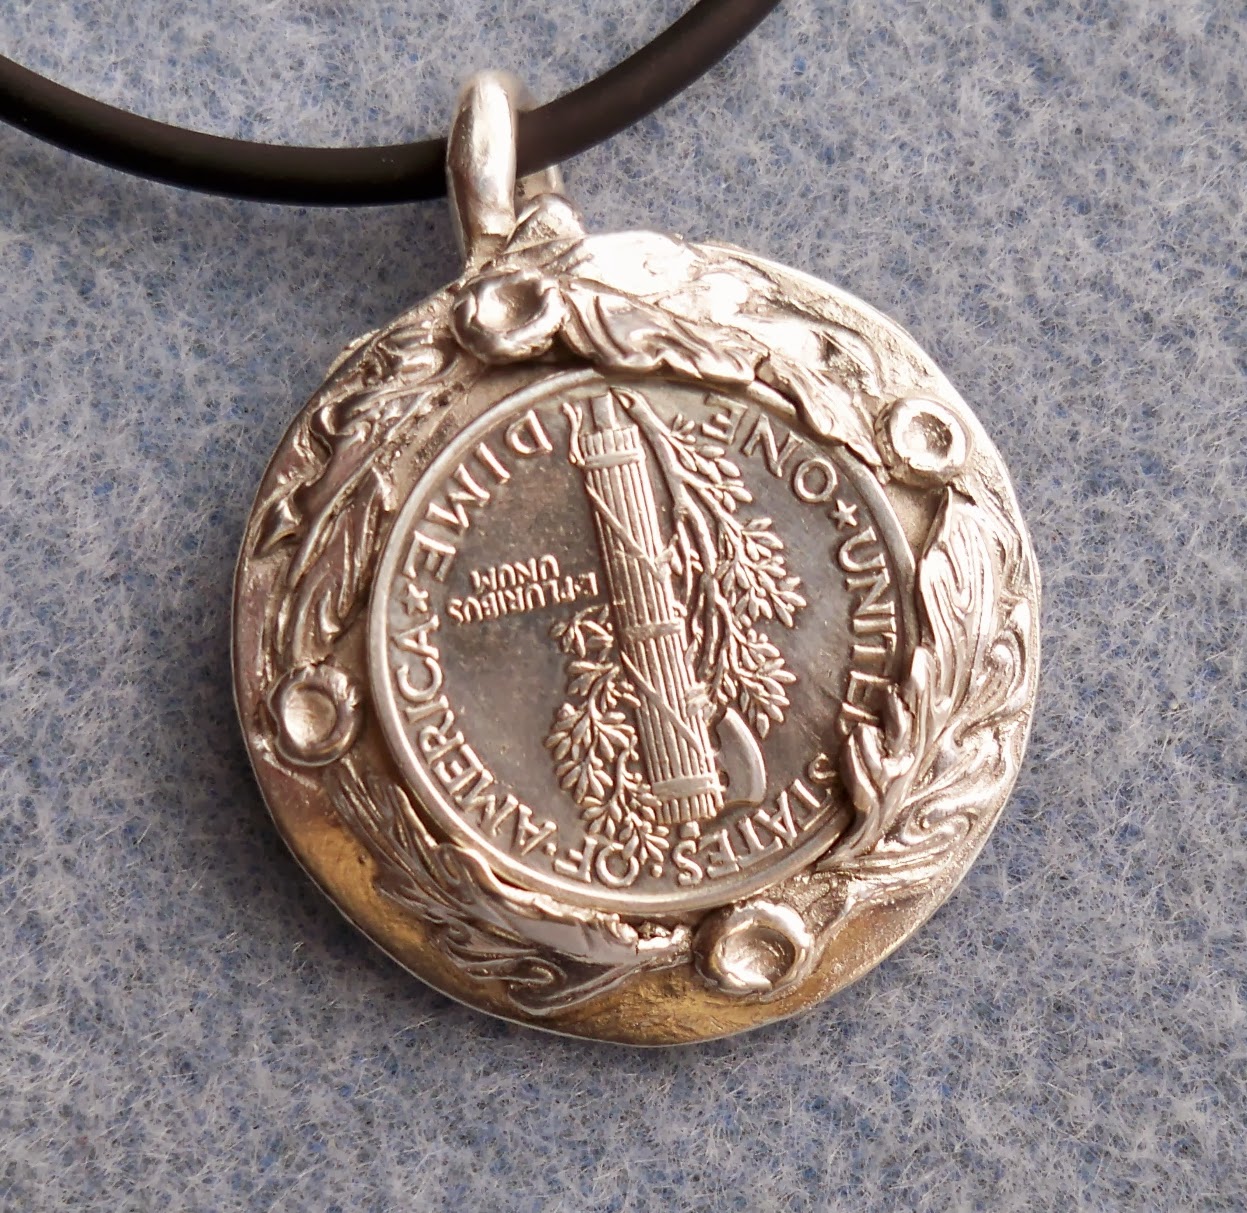
The second commission was to incorporate a 1943 dime into a necklace. I guess I have to say the screw was more challenging to design and execute. But, even though the idea for the dime came to me much easier, it too was a challenge to execute.
Once again I didn't charge the customer for "all the time" I spent on the piece. I was doing something I hadn't done before so I chalked it up to a learning experience.
This time my personal challenge was to create "tabs" to hold the dime in place. The tabs needed to be small enough so they didn't cover the dime too much. They also needed to be made so the dime could be removed in the future if need be. Since I'd never made tabs before, I wasn't sure how thick the clay should be and how high to make the pieces that would fold over the dime. I also wanted them to basically be "invisible" by blending into the design itself.
Another consideration was once again the shrinkage factor of the clay. I needed to cut out a hole that would shrink just the right size to allow the dime to be inserted in the fired piece. Once again the computer was my friend as I enlarged a scan of the dime to 118%. I made a mold of the dime and used it to make a "stand in" so the tabs wouldn't shrink any smaller than I needed them to be.
The leaves were each cut individually and pasted on one by one. Talk about tedious. I didn't put as many leaves on the back as those were to act as my tabs.
My next step was one of the most crucial in the making of this piece. I HELD MY BREATH AND PRAYED IT WOULD ALL TURN OUT! How's that for precise planning?
My method of madness worked and everything fit. Since the silver is at it's most pliable fresh out of the kiln, I added the dime and started the process of bending the tips of the leaves over the dime. It was going well until one of the tips broke off. Luckily (I live dangerously) there was enough other areas to hold the dime tightly in it's place. There is no movement what so ever.