Showing posts with label commissions. Show all posts

Tuesday, October 8, 2013

Heads or Tails?

I just finished two commissions back to back and they both were very challenging.  The first was to incorporate a "screw" into the piece and I wrote about it two posts ago.  

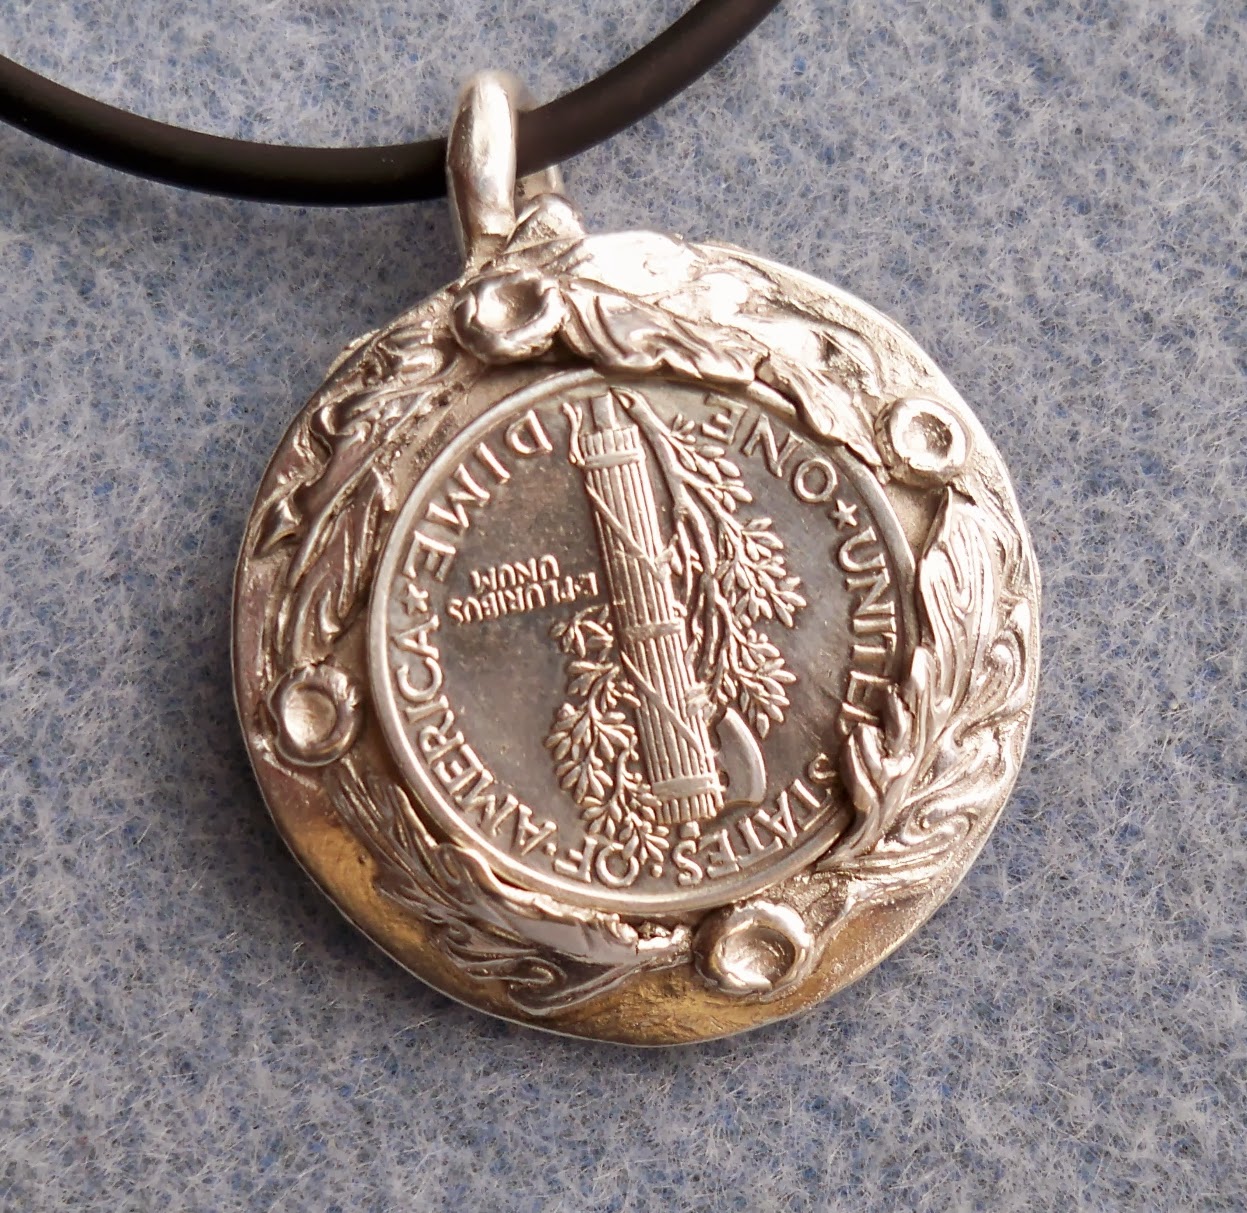
The second commission was to incorporate a 1943 dime into a necklace.  I guess I have to say the screw was more challenging to design and execute.  But, even though the idea for the dime came to me much easier, it too was a challenge to execute.  

Once again I didn't charge the customer for "all the time" I spent on the piece.  I was doing something I hadn't done before so I chalked it up to a learning experience.  

This time my personal challenge was to create "tabs" to hold the dime in place.  The tabs needed to be small enough so they didn't cover the dime too much.  They also needed to be made so the dime could be removed in the future if need be.  Since I'd never made tabs before, I wasn't sure how thick the clay should be and how high to make the pieces that would fold over the dime.  I also wanted them to basically be "invisible" by blending into the design itself.  

Another consideration was once again the shrinkage factor of the clay.  I needed to cut out a hole that would shrink just the right size to allow the dime to be inserted in the fired piece.  Once again the computer was my friend as I enlarged a scan of the dime to 118%.  I made a mold of the dime and used it to make a "stand in" so the tabs wouldn't shrink any smaller than I needed them to be.  

The leaves were each cut individually and pasted on one by one.  Talk about tedious.  I didn't put as many leaves on the back as those were to act as my tabs.

My next step was one of the most crucial in the making of this piece.  I HELD MY BREATH AND PRAYED IT WOULD ALL TURN OUT!  How's that for precise planning?

My method of madness worked and everything fit.  Since the silver is at it's most pliable fresh out of the kiln, I added the dime and started the process of bending the tips of the leaves over the dime. It was going well until one of the tips broke off.  Luckily (I live dangerously) there was enough other areas to hold the dime tightly in it's place.  There is no movement what so ever.  


Wednesday, December 31, 2008

Enameled runner


    In an earlier post, I shared a pair of earrings that I made for the local cross country coach.  The coach's own drawing was used for them.  A few weeks later, her husband asked if I could make her a necklace to match and maybe add some color.  I hadn't done any enameling since my class in June, so I decided to give it a try with the limited colors I had available.  

   As usual I ended up making two pendants.  (Isn't this always what I do with commissions?)  It wasn't so much that I felt the need to make two.  This time I lost the first piece and rather than drive myself nuts trying to find it, I made a new one.  (And of course I found the first piece; once I had made the second one.)  Both pieces were different.  The first piece was the same size as the earrings and had one bail.   I remade the PPP for the second necklace.  This time I was able to make the runner in a full sprint by making the piece wider.  The second necklace also has two bails instead of just one.  

   Adding the enamel was tricky.  The areas to be enameled were pretty tiny (and you know what I said about my eyes!)  Adrienne Grafton down the hall (who studied with Linda Darty) loaned me a brush she said was fabulous for getting into small places.  She ordered it through Thompson's enamels.  When it was loaded up with the wet enamel, one would have thought it was going to deposit big globs of enamel..... but it didn't.  It worked great.  (Got to get me one of these brushes!)

   When the pendant was finished, there was something I didn't like about it.  Finally figured out that it was the smooth texture in both the sky and ground.   So, I tried out my new salon shaper. used one of the grinding tips and roughed up the sky.  Once I added some texture, the figure popped out.  It was just what was needed.  

   This is a very weighty piece with almost $30 of clay in it.  The back has a pattern which makes it reversible too and I strung it on 2mm brown leather cording.

   Again, I have to apologize for the quality of the photo.   It was taken quickly, as her husband was coming shortly to pick it up.  The photo once again does not do the jewelry justice.  

   Many years ago, when I was in high school, I did copper enameling and loved it.  In fact I still have a couple of pins I made way back then.  Enameling on metal clay is just as much fun.  I've got several books on the subject.  But, I still feel that an enameling class is the way to go.  

Sunday, December 28, 2008

Swing locket


    I recently got a commission to make a locket for Christmas.  Never having made a locket before I started looking around for some "how to's".    Tim McCreight's book "PMC  Technic" was recommended to me because Celie Fago has a chapter in it on making PMC hinges.  Making a hinge looks pretty involved and since I didn't have the time for such dedicated learning I kept on looking.  

  In Celie's chapter on making hinges, she showed a picture of a swing locket, which looked intriguing to me.  But, she didn't talk about how she made it.  So, I went on the hunt again.  This time I found directions for her swing locket on the Art Jewelry Magazine's website, purchased them and downloaded (or is it uploaded) them to my computer.  Again, this particular style of locket didn't seem to fit the client that I was making the locket for so I started looking again.

  The third find was almost a charm.  I don't remember exactly how I found it, but there was another metal clay locket in a Vintage Bead magazine.  So, I sent for that one too.  (By now I've got major time and money invested in my searching.)  Took about a week for the magazine to come, but the article appeared to be exactly what I was looking for.  Next I had to order some fine silver keys to imbed into the clay to create the hinge.  (While I was at it, I ordered fine silver tubing, just in case.)  That took a few more days, but once they arrived I set to work.  As I worked on the locket,  questions started popping up about the directions.  The directions were feasible, but sometimes I felt they were not practical or very clear.   

  Finally, I put all that aside and started to work on my own.  As usual, when doing a commission, I made more than one locket.  (Actually three in all.... the other two are not totally finished and may now take a different direction.)   The finished locket is simple and traditional in  design.   (I felt the client wasn't into the arty look.)  The finished locket has a front and a back but can be worn either way.  There is room for a photo on the inside of the back piece.  It turned out to be a swing locket after all.  The biggest challenge for me with this particular design was to have some kind of  "lock" to keep it from swinging apart without warning.  What I did was hang a drop from the bottom with a jump ring and notched out the front (circled in red) so the jump ring can protrude through the front piece and hold it in place.  

  The client wanted some earrings too.  They were made by sandwiching the fine silver key between two discs.  

  All in all I was pleased with the way it turned out.  As usual, the pictures do not do them justice.    The locket and earrings were to be picked up in a few minutes (that is another whole story) , so I just clicked a couple of pictures as they laid on the studio table.  

  Maybe some day I'll get a commission that will be a breeze to make.  (Right .... as if that will ever happen.  I always make more work for myself.)


Thursday, November 13, 2008

PPP earrings


    The last commission I worked on was a gift for the local cross country coach from her team.  The cool thing about this commission was that I was able to use the coach's own drawing for the earrings.  Unfortunately I had to lower the back leg of the runner so she was either just starting out or running slower than the original drawing.  If I had kept the leg where it was the earring would have been waaaaay too wide.  I also had to eliminate some of the little detail in the hat but I think it worked out anyway.  I hear she was wearing them the other day.  How cool is that to wear your own drawings on your ears? 

   I made them using a Photopolymer plate, which is really an easy process.  It just takes a little experimenting on the computer to see how they'll look when they shrink.  I used Standard clay for these so they would shrink a lot.  That gave me the chance to work bigger, but not have huge earrings.   I was pleased with the way they turned out.  What do you think?