Showing posts with label art jewelry. Show all posts

Sunday, January 15, 2012

Differing viewpoints


Another jewelry artist in the National Transit Studios is Swan Daashur.  Swan is an amazing artist and she and I are as different as night and day.  I'm more traditional in my designs and her pieces are definitely art pieces.  We've shown our work together for that very reason.

A while back I was working with copper clay which I rolled onto a bent wire to create my design.  I had done this with bronze and created a necklace that I really like. The copper clay I was working with was a brand that is not my favorite, but since I had it......... might as well use it up.

Well.....this technique was being very difficult in copper.  Every single piece I made broke when I was sanding it.  The first plan was to trash it all, then I decided to try pasting the pieces together and see what happened.  As I progressed it looked like a bunch of bananas.  Still wasn't sure I liked it, but maybe it would work out so I fired it, polished it and added a patina.  Still not sure I liked it.

It laid around a few weeks before I found some beads that complimented it.  At first I was going to just use the beads, but felt that it needed more.  Hence the "run-over" beads in yesterday's post.  They fired with a nice earthy color, so no polishing here.  Since wire was used in the design, I decided to also add a wire element.  Saturday I played around with making some ying-yang wire connectors.

Swan stopped by on Saturday and I was telling her about this piece.  She flipped the focal piece over and said.... "You know me, I like the unusual.  I like the back better." (Swan calls it as she sees it!)  After she left I kept taking a look at the piece, flipping it back and forth from front to back.  You know...... I think I do too.

Thursday, October 21, 2010

Gypsies, Tramps and Thieves


Bangle bracelets remind me of gypsy jewelry.

Barbara Becker Simon was wearing a set of bronze and copper bangles when she came to Pittsburgh last year. They were textured not only on the surface but on the edges too. I really liked them and wanted to try making some.

Debra Weld had patterns already worked out for bangles to allow for the shrinkage factor of the clay. Using the size of Debra's pattern, I made a quick bangle. Again, I didn't spend a lot of time on the design. I wanted to work out the firing dilemma associated so often with these base metal clays. Now that I know it works, I'm ready to make some nice ones similar to Barbara's (Man they were nice.)

This bangle was made with CopprClay and was in the six hour firing I did the day before. It does take a lot of clay to make one of these, so it's best to start with a fresh full package of clay. I want to make some bronze bangles too, but don't look forward to the extended firing time. I really need a different kiln if I want to do much base metal (at least the CopprClay and bronze kind.)


Tuesday, December 29, 2009

Returning to my roots


When I was in high school (when dinosaurs walked the earth), I loved doing copper enameling. I have to say it was one of my favorite art projects. I still have a couple of pins I made and somewhere there is a bracelet.

Anyway, back then we used a piece of nylon hosiery stretched over the jar and held on by a rubber band, to sift the enamel onto the copper. It worked great! But, as usual I thought I had to have all the fancy tools and equipment available. (I'd have more money if I didn't think I had to have it all.) So, I bought a couple of sifters. It's not that they don't work well but they need to be cleaned between colors (and we all know how I like to clean.) Plus, they eventually come apart and they are more expensive than old pantyhose. (I do wash the pantyhose first; unlike my elementary students who use to bring them in dirty for a sculpture project. Gross!)

The two leaf pieces are wet packed enamel, not sifted.

Wednesday, December 23, 2009

Thursday, December 10, 2009

Cleaning House


The process of making jewelry isn't always a straight road of designing and finishing a piece. Instead it is often a zig-zag process. (At least my approach is a zig-zag process.)

As I said in an earlier post, I do have a sketchbook full of ideas but most of my creative process is intuitive. (I design as I go, which is not the most economical method.) So, this method lends itself to lots of unfinished pieces. My goal this month has been to not open one more package of clay until I use up some of those pieces.

The little dove was punched out of a doubled piece of metal clay sheet. I didn't realize that it was not a solid piece on the back, but I liked the negative shape that showed up. When the dove was torch fired, little bumps showed up on it which interestingly were positioned well. I think there must have been a gap between the layers which is why it puffed up. I had a massive stone bead (don't ask me what kind of stone it was) that I glued it to. I named this piece "Wounded Dove". He's been through the war and survived.

The other piece was a water droplet, (actually there were three of them.) I tried several variations where I strung them on a chain, but that didn't work. Not only am I trying to use up fired pieces, but I'm also trying to reduce my inventory of beads. So, the turquoise bead and the water drop were a simple solution to achieving that end. The other two droplets became earrings to match the pendant.

Wednesday, November 25, 2009

Ready, Aim, .........


The new year is still over a month away, but I am making my resolution now. It's not the usual (although I need to make the usual as my pneumonia got me so far off track) but a jewelry business related resolution. (Actually I probably should call it.... updating my business plan!)

I was reading the blog of Babette Cox who sells personalized stamps for metal clay. Her site is http://www.babettecox.com/pnamestamps.htm. I have one of her stamps and am planning on getting more. (I just have to remember to use them and my .999 stamps. Darn I keep forgetting!) Anyway, she had an interview with Don Fredlich who was the guest speaker at the 2008 PMC conference. (His work is wonderful!) He told her that some people say Ready, Aim, Fire and that she was going Ready, aim, aim, aim......... It was time for her to fire. I thought that was a good way to put it. I think I'm just aiming too and haven't fired yet.

So, it's time for me to FIRE! Hence my new year resolutions (or my new business plan, it is that time of year.)

I AM ........
going to write those letters to the school superintendants to see if they will approve my classes for Act 80 credit for their art teachers.

going to take a picture a day of my jewelry for 30 days and post it every day on my Etsy site (it has been sooooo neglected.)

going to apply for the Etsy Metal Clay group

going to enter competitions

going to try my hand at a magazine article

going to check out more galleries for my work

going to begin work on Phase I of the metal clay masters registry (with my friend Carol)

going to check out more teaching venues (which I have already started to do.)

and I am going to finally get started on my Transit jewelry series which is based on the fabulous architecture of the National Transit Building.

Okay, does this sound like enough resolutions? I do have a year to complete everything, right?

Also, here's another piece of jewelry from my "water series". (LOL)


Friday, October 23, 2009

Get a Grip!


Get a grip!!! That's what my friend's husband told her after she thought she peed on a poisonous snake in the woods. I've never heard such a decibel of a scream coming from the human mouth. It was like something out of a comedy.

Oh, right, this is a blog about metal clay (and sometime grandchildren.) Sorry!

Get a grip!! Don't lose that necklace or bracelet because the clasp failed. (Done that.... more than once.) More often than not I just reach for a ready made toggle, clasp or lobster claw to finish off a new piece. But I know that taking the time to make my own clasps will move my jewelry up a notch.

One of the projects in Level II Certification through PMC Connection is to make a clasp. Since sterling silver oxidizes in the kiln, we used fine silver wire as our connector. Now fine silver wire is softer than sterling. So, there are tricks to working with it to make a sturdy clasp. We first bent the wire into a loop at one end and heated the other end to create a ball. Then we hammered the wire flat to work harden it and bent the balled end to create a hook. To keep the wire from pulling out of the metal clay clasp, the wire is embedded into the middle of the clay and runs completely through the clay from end to end. I used my clasp to finish off another Level II project, a piece with a mirror finish. (My mirror finish is very tiny as metal clay can scratch easily. I just didn't see any reason to put all that effort into polishing something that might get scratched. This is sort of my philosophy on dusting too.)

One of my newest pieces, Lola's necklace II, was created from a mold I made from a pair of my Granddaughter's shoes. The shoe had three different patterns on the bottom that all suggested an underwater theme. (For some reason lately I've been on an underwater kick.) I had already made a necklace last year from the biggest shape and finally got around to using the other two designs. The mid-size design was used to create the pendant and the smallest shape made the clasp. I found some really neat purple coral looking beads (I don't know what the heck kind of beads they are) that work great with this design. I can see some younger person wearing a strapless sun dress in this. (Someone without a wrinkled neck and wrinkled cleavage.)

The original plan was to use the Hattie Sanderson magnetic set to create the clasp. Now I really don't think I'm stupid, but I found the directions difficult to follow. I think I had it figured out, but did too much sanding and now the magnets would be sticking out too far. The clasp would have a depth of about 3/4 inch. I think that is just a little too much. But it sure would have "gripped" well. Those little magnets that come with the kit are strong suckers. Every time I get into the drawer where I keep the kit, I have to pry them (and I do mean "pry") off my locking tweezers. I'm not sure that I could get the necklace off once I got it on if I used the magnets.

Instead, I made my own clasp with the fine silver wire. In class, I made both sides of the clasp. For the latest piece I made one clasp, took a ready made soldered jump ring, and beat the heck out of it to make it look handmade for the other side. Whatever works!

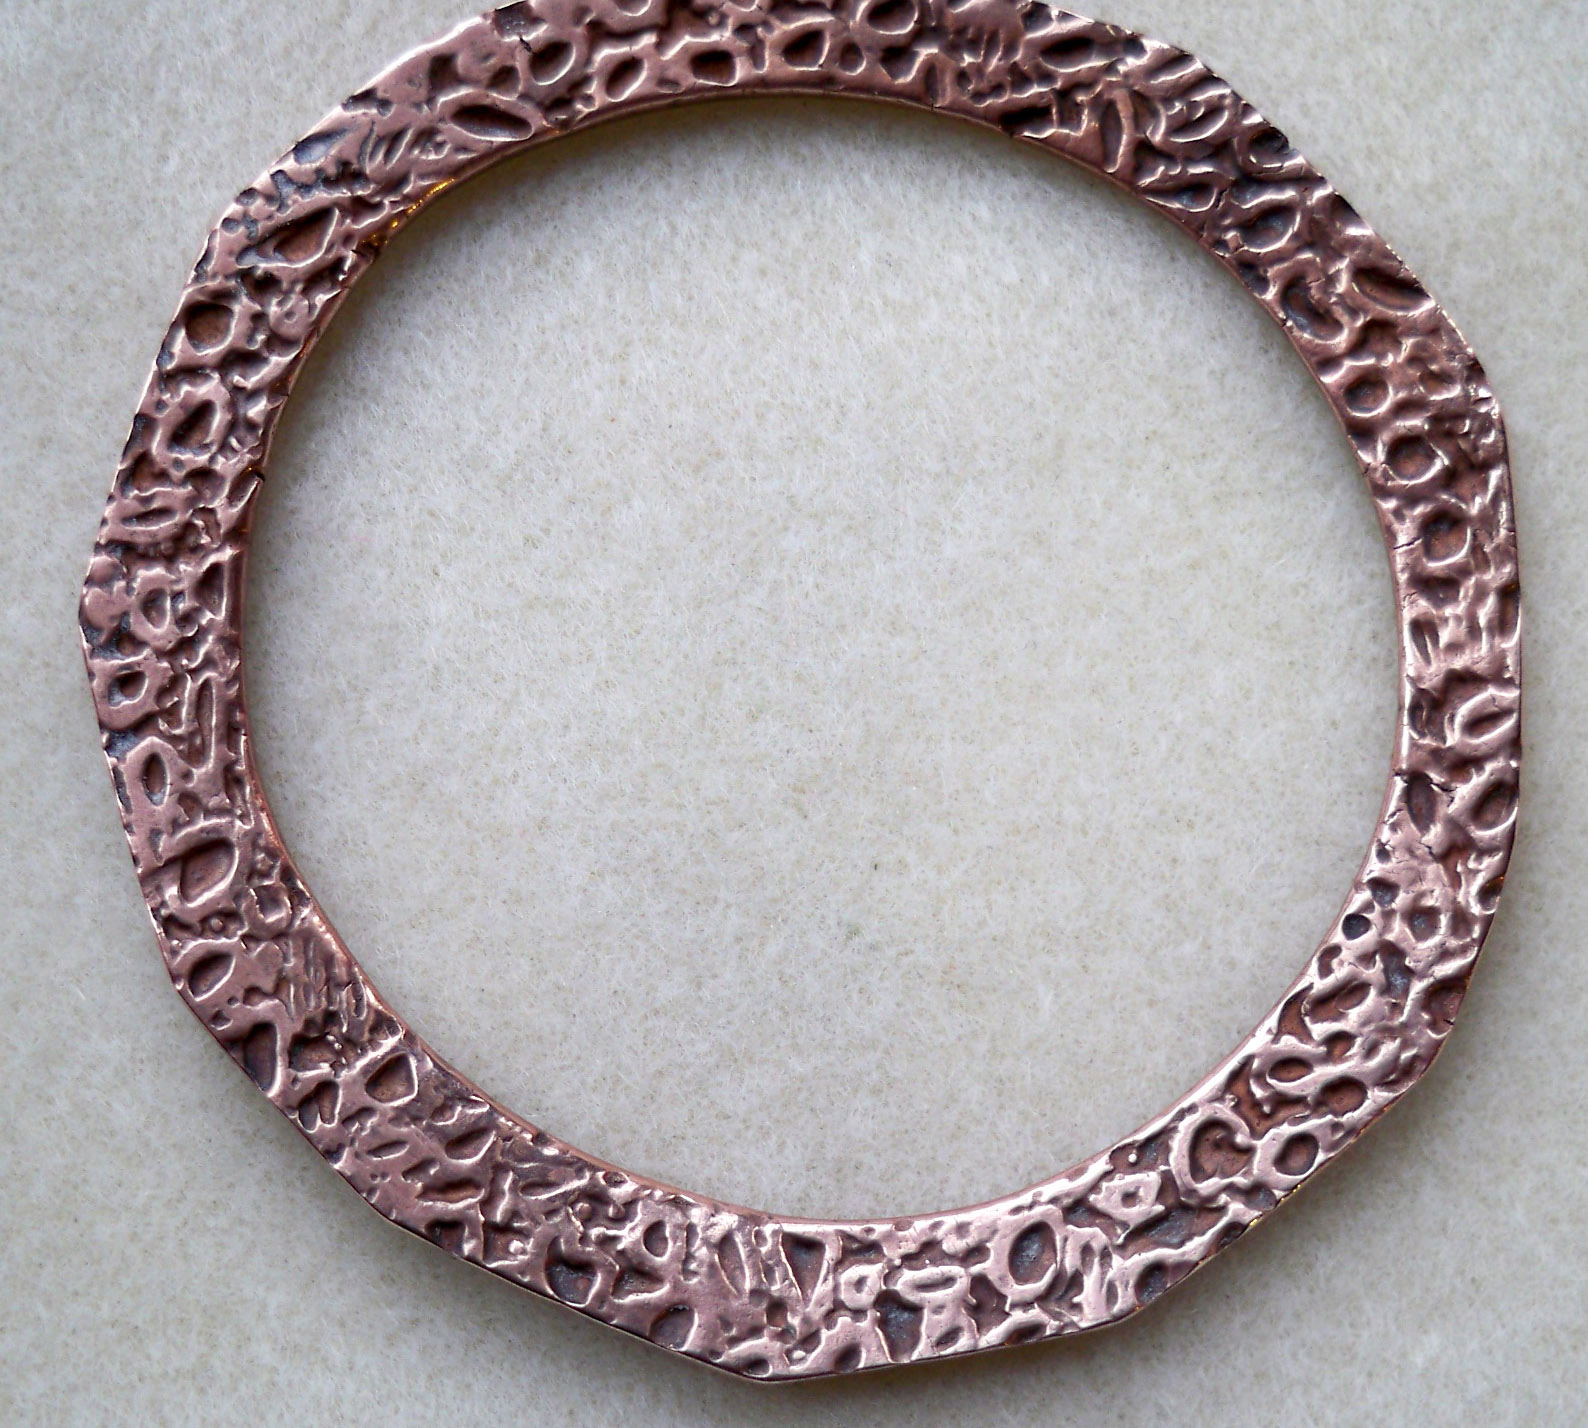
Tomorrow I'm teaching a class on toggles. I've already lost a couple of bracelets. One with a handmade toggle and one with a ready made toggle. I'll be stressing in the class to center the hole, roll extra thick and make the bar on the toggle more than two times the width of the hole.

We work too hard to lose our jewelry because we couldn't get a grip!

Saturday, October 3, 2009

No diving!


My latest beach glass pendant took a dive into a hot bath of liver of sulfur. I'm thinking it was too hot. The glass cracked in several places. The cracks aren't all that visible, until the piece is held up to the light. It is still wearable but not sellable. So, I have myself another new necklace (which is okay.)

This experience is "another learning experience." (There are just too many of those!) If the water for the patina is heated in the microwave, wait until it cools down.

But I do like this piece with a patina.

Wednesday, September 16, 2009

Matching sets?


Personally I don't wear matching sets of jewelry. Just a quirk of mine I guess, but I feel like it's just too much. Well, I sort of wear matching sets. I'll wear a bracelet that matches my earrings, but not a necklace. Not sure why that is.

Actually I kind of like things that are similar, but not matching. I once had a pair of earrings that didn't match (on purpose.) I was told though not to try to sell those kind of earrings (at least not in Florida.)

My brother in law once asked me if I made pieces to match. So, I made a necklace, earrings and bracelet out of a beautiful blue stone (got a mental block about learning my stones) that had a nice weight to it and just felt good in the hand. There was no metal clay involved, just stringing the pieces and adding some sterling silver beads. The set sold all right..... to three different people. Haven't made a three piece set since.

Anyway, the gist of this post is to take a poll to find out if people like sets. Please take a minute and share your opinion.

Wednesday, August 5, 2009

The paper clip test

Well, I took the paper clip test today. It was easy, but not fun.

The studio has been a distant memory for me lately. I had my daughter and grandchildren up from NC the past two weeks and we spent five days with them when we took them back. Needless to say, they came first (most of the time) so I didn't do much jewelry making. But, today I finally made it to the studio. I stopped by in the morning to take some things up for my class and do a firing for one of my students. All went well.

Then I went golfing with my girlfriend. Again, all went well. I had a 48 which was only the second time I've ever been below 50. (Wish I could say that was for 18 holes, but it was for 9.) We had lunch, it was good.

After lunch I went back to the studio, to sand some pin pieces for Foxburg. They sanded up well. Not one broken piece. I loaded the kiln and proceeded to turn it on. Here's where it gets ugly. An unusual message came up.... ERRP. Do you think I could find that message in the list of error codes? (You probably already know the answer to that one.) For a while I couldn't do anything. Then finally, it allowed me to set a program. It went through PRO-1, PRO-2, PRO-3, PRO-4, PRO-5 and then started at PRO-1 again. Now I usually use a single speed firing which should have appeared after the PRO-5. It did not. I kept turning the darn thing on and off. (It worked once before, several months ago. That should have sent up a red flag!) Anyway, the darn thing wouldn't cooperate no matter what I did. No matter how many times I turned it off and on it wasn't going to make it to the single speed mode.

I hate talking on the phone, but there wasn't any other choice. I called the Paragon company (who must have thought I was an idiot for the way I was describing my problem. But, they were very nice.) She told me to unscrew the plate on the front of the kiln. First problem, I needed a Phillips screwdriver, mine was not a Phillips. (And I was battling the time element as this all happened close to closing time.) It took a little longer to get it unscrewed with the regular screwdriver but I did it. (Good thing I wore my screw earrings and ring today.) Then she told me to get a paperclip (second problem.... and then I remembered I had paper clipped the bills I mailed this morning. Lo and behold, it was still in my pocket! Good thing too as I didn't know where I was going to find a paper clip by closing time. I was starting to panic!!) I had to hang up the phone when I began all this. Luckily the Paper Clip test is explained in the kiln's manual. Imagine that!

Basically, you cut the clip in half creating a U-shaped piece of wire. Pull out some wires from the controller that lead to the element inside the kiln and insert the clip where the wires use to be. (Obviously the kiln should be unplugged when doing this. I learned the hard way that you don't lick an electric cord that has fallen into frosting. Don't ask!) Plug the kiln back in, turn it on, push the start button, and if it reads "Fail" you have a defective controller. Guess what......
my kiln "Failed" the paper clip test. A new controller costs $225. Guess I'd better get busy. Got a new bill to pay.

Friday, July 24, 2009

"The fingers can feel......."


The fingers can feel what the eyes can't see. I heard this along the way from someone in my metal clay journey. (Can't remember who.)

This is so true, especially for us old folks. For me the worst part of growing old is not being able to see as well. I don't like driving after dark, I can't read the fine print, and I can't see what I'm doing in metal clay without my dorky visor. It's downright annoying. The hubby gets mad at me because I can't see where the golf ball landed. (If I would hit it straight, it wouldn't be as big of a problem.) I even lose sight of the little arrow on the computer screen and have to drag it to the corner to find it.

So, when I'm working with the clay it definitely is important to run the hands and fingers over the piece (somewhat like a blind person.) The fingers can feel an unwanted bump or rough spot and smooth it before it goes into the kiln. (Much easier to do before.... than after.) And, if it is sharp now, it will be sharper later.

The picture is of my oldest grandson wearing my visor. (He thinks it's cool!) He looks cute it in...... I don't!

Wednesday, July 15, 2009

Who am I?


In an earlier post I talked about trying to find a "style" that expresses who I am. Without realizing it, I guess I have.

The artists from the Transit Studios are painting a car to put into the Oil Heritage Parade next weekend. I missed the first two painting sessions but was able to make it last Sunday evening. I told them I wasn't a painter and I'm not. (Although I sure did enjoy painting my share of the fender. I didn't want to quit.)

Anyway, one of the other artists, Swan Daashuur (also a jewelry artist) came by when I was painting. She made the comment that any one who knew my jewelry could tell that was my painting. My painting looked like my jewelry.

The painting wasn't planned. In fact I had no idea what I was going to paint on the car. My business name was the first thing, then the fine silver and from there I just started to paint. (That is most often how I create my jewelry.)

So, who am I? I am twining tendrils, neurons and connectors, swirling and blending organic forms that fade into each other. (for the time being!)

Other views of the car with paintings by other Transit artists.

Friday, June 26, 2009

Soldering versus pasting

 In my last post, I talked about soldering earring backs versus pasting the backs.  Here are the photos of those earrings.
My very first (and I do mean first) pair of metal clay earrings were made following directions in CeCe Wire's book, Creative Metal Clay Jewelry.  I was starting to teach myself metal clay, this was the first and only book I had and this was the very first project in the book.  ( That's a lot of firsts!)  The directions said to use a dab of syringe to attach a sterling silver earring post to the back of the fired snail shape.  She also said to paint the posts with silver clay slip prior to firing so they won't oxidize and turn black.   (I used fine silver posts so I didn't have to do that.)  The firing time was stepped down, (due to the use of sterling.)  I still followed her temperature and time though; 1, 110 degrees and two hours.

My second pair of post earrings, actually began as a ring.  This was the second ring I made (before I started to use ring pellets) and it did not shrink as much as I thought it would.  (You know, it's that Murphy's Law thing.)
Anyway, it didn't look much like a man's ring, so I got out the old jeweler's saw from my college days. (I was surprised that I still had it.... let alone find it.) and cut it in half to make semi-hoop earrings.  I broke it in the process, but thanks to Art Clay oil paste I was able to repair it.  (That was before I knew about making lavender paste.)   Once again, I used CeCe's recommendation and used syringe to attach my posts.


My last pair of earrings was made at Arrowmont.  Linda Kline had us solder sterling silver posts to the fired earrings.  The earrings were decorated with a Photo Polymer plate and fired flat.  They were bent around a ring mandrel to create the hoop after firing.  As I said before, I was pretty nervous about soldering   Metal clay is very porous and sucks up solder, so the area had to be burnished heavily to keep the solder from soaking into the clay.  Also, since the posts were sterling, they had to be pickled after firing to remove the fire scale.  

   The posts in all three earrings look pretty much the same.  The only difference I found was that the fine silver posts have a bigger pad area.  This gives more area for the paste (or syringe) to adhere to.  The sterling silver posts we used in class, had a rather small pad.  

   Now I know that the title is...  soldering versus pasting.  And I know that I didn't use paste to attach the posts,but syringe.  But now I use lavender paste for all my pasting jobs and that will go for any future post earrings.  I also would fire at 1470 degrees F for 30 minutes instead of the two hours.  I don't feel that I'll have any problems with that.

Wednesday, June 10, 2009

Submarine Rock


    This is the third out of four of my rock pendants (the fourth one isn't done yet.  It is one of those that is still speaking to me..... been doing that for three months now!)  While working on this piece, I was drilling a hole with a bur setting bit (creates a conical hole for the stone to set in), when I pushed a little too hard.  (There I go again!)  So, time to be creative.  I had a red CZ already set in a metal clay bezel that fit perfectly over the hole.  (Actually it was rather cavernous.)

    The piece also makes use of the same texture as "Mother Earth" but for some reason this piece reminded me of a submarine, hence the title.  All three rock pendants also have syringe work on them.  (I've come a long way baby with that syringe.  Now I control it.... somewhat.)  The fourth pendant does not, (so far.  Only time will tell.)

   I had a strand of garnet beads that seemed to go well with the CZ.  I also made some end caps to finish off the strand of beads and tie in with the texture on the bead. Okay, I just took a second look and I guess they aren't end caps but beads.  (Another mental lapse.) The picture didn't turn out as well as I wanted it to, but it still shows what it looks like.  Still working on the picture taking so I can start posting things on Etsy again.  


Sunday, June 7, 2009

Mother Earth


    Here is another one of the rock pendants.  I still may change how I hang the pendant as I don't really like the plain black rubber cord. 

    All of these pendants start out plain and get textured and embellished after they are cut apart and pasted together.  That way there is contrast between the smoothness of the rock shape and the texture.  This particular texture is one that I originally didn't like.  But for some reason it now appeals to me and I have used it in three of the rock pieces.  It's probably because it has a very "earthy" feel to it.

   This particular piece reminds me of the strata of the earth, hence the name "Mother Earth".  Usually my pieces are tumbled and receive a patina, but this piece told me that it wouldn't look right.  (Yes my pieces talk to me.... don't yours?)  I've made four rock pieces so far and only one of them was tumbled and darkened.   They tell me they look best with a matte finish.

   Most of my work isn't finished in one sitting.  It has to sit and "simmer" while I look at it and decide what it wants me to do.  Often it takes a big journey before it becomes it's final self.  (Occasionally it goes back and takes another journey or two, changing as my perspective of it changes over time.)


Aquarius

  A while back I taught a class using Hadar Jacobson's technique of using a rock to form the metal clay.  A two card thickness of clay is wrapped around a rock and the edges are smoothed together.  When the clay is totally dry, the clay is cut all the way around the rock, removed and pasted back together.  

   This was my demonstration piece during the class.  During the process of sanding the piece, I broke off one end into several pieces.  As I was getting ready to piece them in, I decided to just seal the end up.  The piece looked more interesting to me this way as it suggested a water pitcher.  (See I broke it as a learning experience for my students........ right!)  

   I added a swarovski crystal drop for the water droplet.  Originally I was going to add crystal beads for the necklace, but decided a more earthy stone would work better so I used tiger eye beads instead.  There are a few crystals spread out through the beading to tie in the drop.

   Nothing ever goes smoothly.  Every creation is a challenge and often, that is a good thing.  (Now I  sound like Martha Stewart again!) 

Monday, June 1, 2009

Underwire


  NO I'm not talking about bras in this post.  (Although I did just buy a new one with underwire support.  It's obvious I need one.)

   I'm talking about wire under the metal clay to help form it.  The book PMC Technic and Barbara Becker Simons new book both demonstrate the technique.  The first one I tried is rather large and is not yet done.  At first it looked very sculptural to me and I thought about turning it into a sculpture until my friend Carol said she could see it as a piece of jewelry with tubes in it.  So, last week I bought some brass and some copper tubing.  Will share when it finally gets done (don't think that will be any time soon though as the old brain is sometimes slow.)

   The third charm on my bracelet was created with a much shorter (not smaller) piece of copper wire.  The wire was bent into a shape with twists and turns (so far I find it is impossible to predict what the finished clay piece will look like.)  It is important to make sure that the wire sits on the table and that there are no sharp points to tear through the clay.  Then a sheet of clay, 2 cards thick, is rolled out and draped over the wire.  At this point the clay can be formed into the recesses of the wire with the fingers.  Dry the clay and carefully remove the wire.  I thought it would be difficult to take the wire out, but it wasn't.  When the form is totally dry, lay the piece on another 2 card slab of clay (to form the back)and cut around it with a needle tool.  Then paste the back piece to the front piece, smooth the edges together  and fill in any gaps with extra clay or paste.

   Before I joined the back to the front on this piece, I made a wire loop, twisted the ends of the wire and inserted it between the front and back piece.  What I thought was fine silver wire (that's what it said when I bought it), turned out to be sterling silver wire which turned black during the firing process.  As an after thought I decided to add the peridot, so I refired the piece with a readymade bezel cup (and covered the black wire with metal clay paste.)  

Sunday, May 31, 2009

Water Etching


    This charm is an example of water etching.  The technique is fun, easy, and can be used to create different levels of depth in a work.  

    The technique is done by drawing a design on a dry clay piece.  Then, using nail polish, the areas that are to be raised are painted.  The polish acts as a resist.  It is a good idea to paint the back of the piece too as it can get water on it.  The edges can be painted to create a raised effect or left unpainted to recede.  Since this process removes clay, the original clay piece should be made several cards thicker to make sure it doesn't get too thin.  When the polish is dry, take a damp sponge and begin wiping across the surface of the piece.  Rinse the sponge and repeat until the desired depth is reached.  (Be sure to save the dirty rinse water..... there's silver in there!)  Texture can be added to the recessed areas (while they are still wet) with a stencil brush, using a stippling effect.
   

Friday, May 29, 2009

Swarovski melt


    I've added another new charm to my education bracelet, (actually three more which I'll share over the next few days.)  Two of the techniques I learned at the Arrowmont retreat.  The Senior Instructor from South Africa, (sorry I can't remember her name.) showed us this.  It only takes a few seconds and can add a spark of color to your metal clay creations.

   Drill a hole in the piece you want to decorate (of course it is easiest to do in the dry clay before firing.)  Also, make sure the hole is fairly large.  (This helps the crystal to melt down into the hole better.)  After the piece is fired and cooled, position the crystal on the hole.  I used a 4 mm crystal bead.  (Metal backed swarovski beads and AB swarovski beads are not good for this technique.)  Using a torch, begin heating the area around the crystal and over the crystal until it begins to turn orange and balls up.   That's it.  That's all there is to it.  How cool is that? 

   My charm has held up (which for me was a test of the strength since a bracelet gets lots of pounding.)  I did not tumble this piece as I liked the white inside the dish shape.   I also tried it in a by-pass ring I made but the holes were too small for the bigger crystal to melt down into.  It might have worked if I had used a smaller crystal. 


Sunday, May 24, 2009

Wide cuff bracelet


   Originally I was scheduled to take a polymer clay class on my last day at Arrowmont, but due to a family illness the class was canceled.  So, I had to make another choice for Friday and chose the Big Cuff Bracelet by Sharon Gillespie.  Since I already knew some basics about polymer, I was glad I was able to take the bracelet class instead.
    This is the bracelet that we made in class.  We cut out our rectangles and formed them on a metal bracelet mandrel.  The center piece was laid across the top of the mandrel and the side pieces were laid across the side of the mandrel (it was laying on it's side.)  I chose the orange CZ's to go with my ring.  
   We used the embeddable bezels from Metal Clay Findings.  I had used them once before and they curved the piece I used them in, but that didn't happen here.  (Maybe it was because the piece was already curved.)  My judgment on the use of the embeddable bezels is still out.  I was not able to curve the bezel over my largest stone and had to glue it in instead which is against my better judgement but so far so good.