Showing posts with label metal clay jewelry. Show all posts

Sunday, December 13, 2015

Varying a multiple

The photopolymer process is often used to create multiples.  This makes it quicker and easier to repeat a design.  If I want to be able to tell people that a certain piece is one of a kind, I need to vary each piece a little.  Often that is changing the color of a CZ or firing the piece in a different generation of clay which creates different sizes due to the shrinkage of each generation.  It may also mean varying the kinds of beads that each piece utilizes in it's final design.  These are some of the things I did with my skulls.


Sunday, August 3, 2014

It's going to be small!

Every year I publish my blog in book form.  I just realized that my last post was on June 12th.  If I don't get busy, the book this year is going to be very, very, thin.

My newest direction is to keep it simple.  (At least keep the front of the piece simple.)

I've done draped pieces in bronze and copper, but not in silver.  So I finally did one in silver ....... and I like it.  I kept it for myself and have been wearing it a lot.

The Front

The Back (haven't worn this side out.  I like the other side too much.)

I have another simple piece that isn't finished yet as I have to figure out how I want to hang it.
So..... I may be posting a few grandchildren posts mixed in with the metal clay posts.  

Need to thicken that book somehow!


Friday, May 23, 2014

A follow up.

I'm finally following up on a post I did on March 2.  Finally finished the "beer cap" piece that I posted about.  Actually it's been done for a while now, but I've been in some kind of "funk" or "artistic drought" if you want to call it that.  (Although this funk has carried over into other aspects of my life.  Can't wait until it's over.)  Sorry but I've dropped off the social map for a while too!

So, here is my latest Beer cap piece. If I do it again, I'll place a CZ at the top.  (I kept wanting to turn this one and drill a new hole.)   


I did get some good news yesterday that I am hoping sparks my mood.  I finally am going to do Franklin's Applefest this year.  I've tried other years and did not get in.  I found out that bulk mailings are sent out every year when I'm in Florida.  And since bulk mailings are not forwarded, I wasn't getting the application forms.  

This year we gave them my cousin's address.  She contacted me the day she got the form and over the phone we filled out the application.  Then I emailed pictures of some of the pieces in progress and pictures of the finished pieces.  The Chamber told us to return the forms early as it was on a first come, first serve basis.  We were the very first form returned.  (Can't get any earlier than that!)  

So now I need to get my tent out to practice setting it up and get to work on some pieces for the show.  My beer cap earrings are one of my favorites so I think I'll focus on making a bunch of those with variations.  Hopefully that will get the creative juices flowing again.  (Lord knows I need something.)

Friday, April 25, 2014

I'm still a Pisces

Yesterday I did a post on the making of my piece for the Tionesta Art Auction.  That post was about the making of the fine silver fish.  Today's post is about the final piece and how it came about.

My original intent was to make a necklace for the silent auction.  But I got to thinking that I was already donating a butterfly necklace for the regular auction.  Also what usually happens with jewelry, is that it gets set on a table and gets lost among all the large paintings that are hanging above and around it.   No one really notices it, until it is held up and brought around before the bidding starts.  I knew that would happen with the butterfly necklace (although I put it in a large box, hoping that would help.)   I also put a note in with it that signified that it was fine silver.  Last year someone wrote on the tag that it was pewter.  (Big difference between silver and pewter.)  That's what led me to "hanging" the jewelry like a picture.

I procrastinated and the final piece came about around 10:30 the night before.  I was sure I would have to pull an all-nighter because things were not going well.  (I really wasn't sure the direction I wanted to take.)  Earlier in the day I ran to the Dollar store and bought a couple of frames and some glass cabs (clear ones, blue ones, big ones and small ones.)  Didn't know what I would need so I figured it was best to have more than not enough.

I played around with the positive and negative traits of the Pisces by typing them out.  I thought I would cut them out and paste them like a collage.  Wasn't working.  My mind was blank.  Printed some on white paper.  Didn't like it.  Printed some in different fonts.  Didn't like it.  Couldn't figure out how I wanted to arrange the words or if I even wanted to use words.  At one point I decided I would just chuck the idea and make the fish into a necklace.  I had brought home the beads from the studio and the tools.............. but not the beading wire.  Damn!  It was getting later and later and I was mentally blocked.

Next I tried typing the words in Photoshop.  Naw!  I would be able to type around a path if I used Illustrator.  Naw........  haven't used Illustrator in years.  Couldn't remember how to do it.  So....... back to Photoshop.  Decided to use blue paper to print on, typed out my words and manipulated them with Photoshop.  It looked pretty good to me.  I put the positive traits at the top and the negative traits at the bottom.  Then I distorted the negative shapes so they were not as easy to read.  Next step was to figure out where I wanted to glue the glass cabs.  (As you can see I didn't need the blue ones or very many for that matter.)   I tried all sorts of placement before I decided to just put them on the bottom.

The next hurdle was attaching the fish to the picture.  Thought about cutting a space for the bail to slide through to the back but the backing for the frame was too hard.  (I'm such a wimp,)   I decided to take it to my studio the next morning and drill a couple of holes with the drill press (hoping it wouldn't chew up the paper.)  I made a test piece to drill through first.  It worked, clean as a whistle.  I threaded a wire through the bail and into the holes.  Gave a little twist to the wire in the back and my fish was attached.  Ready to go.

Well not quite.  The fish didn't hang the way I wanted it to.  Now what to do?  Time was running out.  I needed to get on the road to deliver it.  My cousin and I tossed around a few ideas and we came up with the idea to glue something to the background behind it.  A few clear beads glued in strategic places and it was finally done.


I had a student one time who said  "Art is hard work.  You just don't know it."   

Believe me..........  I KNOW IT'S HARD WORK!  (But I can't quit.)

Friday, October 18, 2013

"Makin" It

As was mentioned in my post about the "Screw" Necklace, I used an extruder to make the sides of the necklace.

An extruder is a tool (mine was made for polymer clay) that pushes out a line of clay in a variety of shapes.  I haven't used mine that much and sometimes I wonder why.  It is such a handy little tool.


This is a Makin Extruder, which can be bought in any craft store.  It comes with a large variety of (for lack of a better word) templates.  These templates are placed in one end, the clay goes in the other end and then the handle is turned..... pushing the clay out through the template.  This creates a line of clay in the shape of the hole in the center of the template.  The templates come in a variety of shapes, triangles, squares, rectangles and circles to name a few.  


For the "Screw" pendant I used the square template for the outside edges.  I needed something to create the well that would hold the resin.  Since the size of the square extrusion was rather large, I cut it into fourths after extruding it.  The inside divisions were rolled by hand using a flat sheet of Plexiglas to make them more even.  

Another great feature of the extruder is it's ability to make hollow pieces.  (It did take me quite a little while to figure out how to use it.   Unfortunately it's been quite awhile ago, so I'm sure it will take me that long again.)  These templates push out something equivalent to a piece of "macaroni."  (Tried covering a piece of spiral macaroni once with metal clay paste........ it didn't work.)  


This piece took me a long time to make as I wasn't sure how I wanted to finish it.  I made the focal piece in a class and obviously my idea changed along the way.  I didn't finish it the way I thought I would.  (Hence the extra two holes at the top.)   


Tuesday, July 23, 2013

Demos

Teaching a class obviously requires a demonstration of techniques and how to use the tools.  When doing a demo the teacher has two choices.  Keep the piece and finish it...... or roll it back up into a ball of clay.  Occasionally I've returned the piece to it's original form, but usually I save it and finish it there or later.


Since I've been doing a lot of classes lately I've got a lot of new demo pieces.  Most of the classes have been Intro classes so the demos are very basic.  (I have a ring class coming up the end of August that is already full...... Yay.  That's what I like to hear.)


Fold over bail pendant.  Learning how to work with clay, texture, shape and set a fire able stone.


 Making a Lentil bead.  This class creates a two-sided piece.  One side
uses left-over paper clay.


Using left over clay to make a simple pair of earrings

Sunday, May 12, 2013

Backing it up

As I mentioned in yesterday's post, the back of our bezel pieces were important too.  For these pieces we embossed designs into scratch foam for both the back and the bail.  This was done with a ball point pen and an assortment of other tools.


Of course the design will come out reversed and it is difficult to get a good idea what it will look like.  Wanaree uses Silly Putty to test the designs.   Just soften a piece of Silly Putty, push it onto your design and you can instantly see what it is going to look like.   The design on the far right is the one I chose.  I didn't like any of them until I gave them the putty test.  But, the two on the right look far better than they appear here.  We did the bail designs the same way.  


This isn't the best picture. I think I'm going to take the flex-shaft to it and get the high points much smoother.  

This was not my original backing.  The piece I made for the backing the first time was too small (thus the need for the thicker border in the drawing.)  It was already dry before I realized it wasn't the right size so as with lots of metal clay greenware it would be used in something.  In this case I used it with a ring shank I had made during my Rio Certification class and had never fired.  Voila!  A new ring (for sale....... size 7 1/2 if anyone is interested.)


Tuesday, November 13, 2012

National Transit Jewelry Series

As I've mentioned before, the National Transit Building in Oil City, Pa is an example of gorgeous architecture.  Anyone who has ever visited has noticed how amazing the building is, both inside and outside.

Inspiration for art most often comes from the artist's life..... what they see, experience, feel, hear and more.  So the designs that I pass everyday on the way to my studio is a natural inspiration for design.

The designs I used are basically literal.  How else will people who briefly pass through be able to associate with the jewelry.  What I have done is try to use them in a variety of ways to make them each different.

The ground floor is tiled and has a narrow tile border that reminds me of a celtic design.  (Not sure that it is.)

This is the design created from the original tile. (Couldn't find my photograph of the tile itself.)


I created a couple of very long necklaces using the floor tile design; one in copper and one in bronze.   The bronze piece took awhile to make as I incorporated some of the chain I bought at the bead show.  I really like the look of combining chain with beading (not to mention how much further the chain will go.  I have enough left to make another necklace.)

Now I want to create more necklaces to be worn with these.  (One thing always leads to another!)


Friday, July 27, 2012

That time of the year

For over 30 some years Oil City has hosted the Oil Heritage Festival on the third weekend in July.    Well, it is that time of year again.


Two years ago, I bought a tent and set up in the street.  My goal was to get my feet wet at outdoor exhibiting and to create a gallery setting within the tent.  As was mentioned in a post on that show, I succeeded at both my goals and made some money too.

Last year, I moved inside the Graffiti Gallery and exhibited with Swan Daashuur (the other jeweler in the Transit.)  We were positioned behind the tents and sales were pretty dismal.  Swan sold more than I did but still not as much as she expected.

This year I had planned on going back out on the street but Swan persuaded me to try the Gallery one more year.  This year the Festival Committee left the space in front of the Gallery open so it was more visible.  We still did not have the number of visitors the street vendors did but it was so much better than last year.  Sales were pretty good today (hoping that tomorrow is even better.)   And, we will be leaving the show up for the entire month of August.


Work by John Mander, Corinne Carbaugh, Abby Bunnell and Swan Daashuur


Part of my display.


 The outside vendors set up  today and it was a good thing it wasn't yesterday.  We had severe storms yesterday and the fire sirens kept going off to warn us of possible tornadoes.  (The Transit Building is built like a you - know- what.  So, if I have to be somewhere during a storm the Transit is my choice.)

Today the wind came up again and it rained for about an hour.  Some of the tents were toppled and people were looking pretty wet.  So..... I'm thankful I was inside.  Linda Lineman who paints porcelain decided that she was tired fighting the weather every year and will join us inside next year.


Thursday, May 31, 2012

Relay for Life


This Saturday is Relay for Life   

This is the second year in a row that I've donated a piece of jewelry for the relay.  My daughter in law, who always takes part in the race is adding jewelry cleaner and a polishing cloth to our contribution.

I finished my piece yesterday.  Nothing fancy, but hopefully something that will remind the wearer to keep up the fight against cancer.  Something we all need to do.

(The crystal is actually purple, but it sure looks pink in this photo!)

Thursday, April 19, 2012

It's about time


There are several large windows in the National Transit Building.  A couple of them are filled with items from the National Transit Gallery which sells art by local artists.  

Swan Daashuur, one of the other jewelers in the studios, has had her work displayed in one of the other windows for the past year or so.  Her work looks amazing displayed on three ornate columns, especially at night with the lights on them. (Her work looks amazing no matter where it is displayed!)   For the longest time she has wanted me to display work in the other window.  

Last year I bought four small columns, intending to use them in the other window (which had been sitting empty all this time.)  I thought of several ways to raise them to an appropriate height, but never acted on it.  (Just a little lazy, I think.)  

Well this year in Florida, I found some large columns.  Thought twice about transporting them all the way home without breaking them and having plaster crumbs all over the van.  Glad I didn't take that route.  I found them back here and they were even on sale. 

The photo isn't the best.  I wanted to get a picture with the lights on them (but I was too tired to hang around until dark.  Maybe some other time.)  


Tuesday, November 15, 2011

Friends of the Transit

Last Saturday night the artists of the Transit Building held their first annual Friends of the Transit Award Event in the Graffiti Gallery.  As a newly created subdivision of the Civic Center, the artists Maureen James, John Manders and myself created the Friends of the Transit Program.

The purpose of the program is to bring the community into the Transit Buildings and with a membership become a part of what is going on there.  Not everyone feels they have artistic ability but they may have an interest in the arts and the program will allow them to help develop the arts in Oil City.  They can do this by helping out with promoting the art events, volunteering to work in the Graffiti Gallery as a sales associate, helping artists in their studios, giving tours of the building, etc.   Any money generated through a membership in the Friends program will be passed onto the Civic Center and will be used to preserve, restore and upgrade the buildings.  

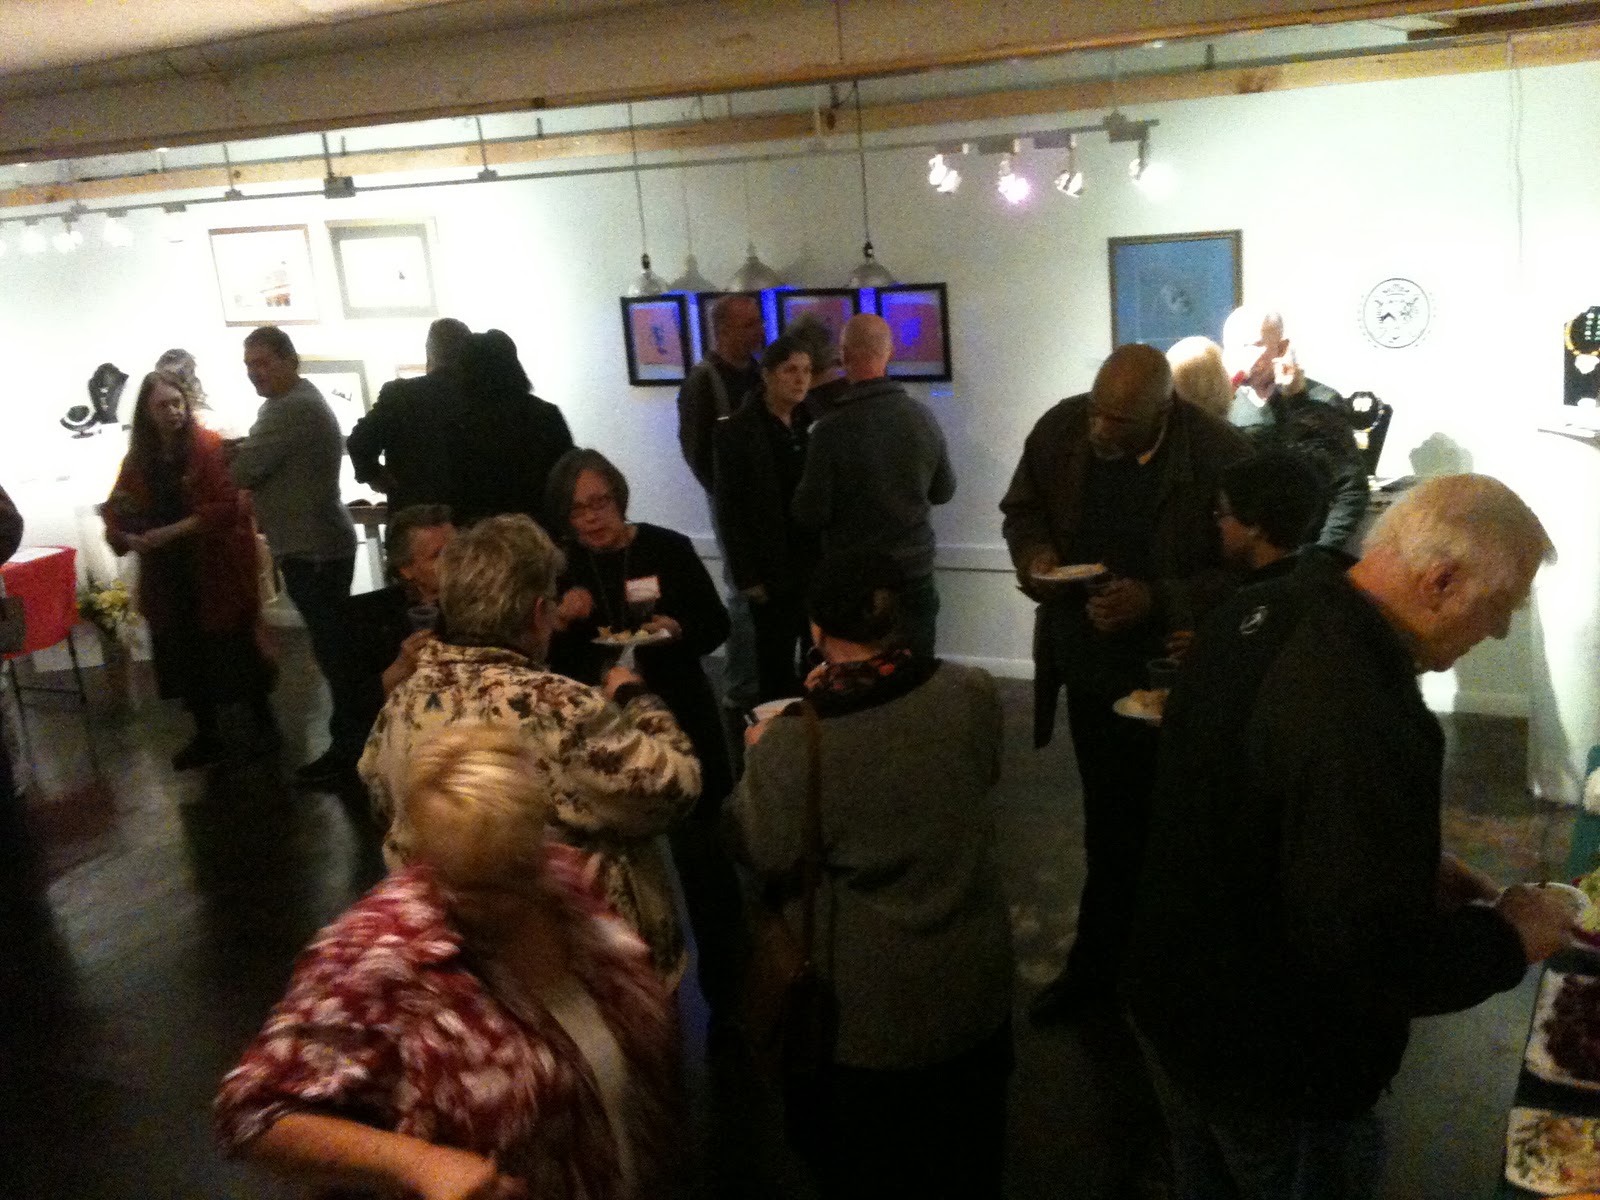
So, Saturday night was our kick off event.  It was a fun filled and busy evening.  (I do apologize for the photos.  Took them with my phone and wasn't very diligent about checking what I was doing.)

Festivities began at 5:00 (after our usual Second Saturday Open Studios) with a social time for people to look at the artwork in the Gallery, have a little something to eat and drink.  From 5-6:00 Mitch Littler, a young man from the area (oh Oil City has so much talent) played his guitar and sang.  He shared his music with us again from 7:00-8:00.  

Mitch Littler

At 5:30, four of the building's artists took part in what was called the "12 1/2 Minute Painting."  Abby Bunnell, George Cooley, Shon Gaworski and Carol McDonald each shared their unique styles and vision by beginning and completing a painting in the time it took to play a rousing song.  At the end of the evening the works were given away to some of the participants.  

Shon Gaworski

Abby Bunnell

George Cooley

Carol McDonald

At 6:00 I gave a basic demo on metal clay, complete with a torch firing demo.  

The award presentation to Dr. Robert DeShong was given at 6:30.  Dr. DeShong has put in many hours doing physical work at the buildings as well as donating funds to help with various projects.  He gave a very nice speech following the presentation (which I can't remember but I remember thinking how nice it was.  I was cleaning up my area so John could do his caricatures there and I was listening but not totally catching everything that was going on then.  Didn't even get a picture of it.... darn!)

6:45 to 7:45 John Manders, our resident book illustrator did caricatures of many of the attendees.  (Sorry, didn't catch a picture of that either as I was upstairs at the Forestwood Performing Arts Academy learning how to do the cha cha.)

At 7:00 Darin Paden, owner of  the Forestwood  Performing Arts Academy on the fourth floor of the Transit Annex, gave a mini-class in the cha cha and a demo on the 4 step swing.  I gave the cha cha a try and it really was pretty easy.  Darin did a great job of breaking it down and taking it slowly.  I was doing okay until he added a turn and twist (which right now is not too good for my bum knee.)

The evening was full of good people, good art, music, dance and food.  (All donated by the Transit Artists.)  What a party!

Anissa Gage's center piece made from vegetables and dried plants


Thursday, September 29, 2011

Can't keep a Ginkgo down


A few posts back I was lamenting the fact that the Ginkgo tree along the path I walk to the studio had been trimmed.   And, all the branches (and leaves) were no longer within my reach.  (But some of the path has such low hanging branches that I have to duck to walk through there.  Can't figure out why they weren't trimmed.)

Well, you can't keep a Ginkgo tree down.  There were five little leaves breaking through where a branch had been cut off.  So I was able to get one last leaf today to use with the metal clay.

Since we were working with copper clay today, I now have a copper version of the Ginkgo for a pendant.  (At least in the greenware state.  Will wait and see what happens when it's fired.)

Wednesday, October 20, 2010

Copper earrings


Yesterday's firing of CopprClay was successful and today's kiln firing of Art Clay copper was also successful. After tumbling, both clays look the same color. Now onto working out the firing schedule for Hadar's copper clay.

These earrings are AC copper with hammered copper wire; long and dangly.

Friday, July 23, 2010

What is success?

If success is measured in dollars, my first day of my first show was not successful.

So.... why do I feel successful? Maybe because money wasn't my goal. I went into this show for the experience and my first day provided lots of experience. Experience with wind, rain (heavy rain), thunder and 90 degree heat in the shade. (Thank God I bought two fans last night and paid to have electricity at my site.)

That expensive tent was well worth the money. Neither wind nor rain bothered it. In fact we zipped up and stayed inside during the heavy storm. (Several others lost walls and one person lost "all" her inventory.)

I made contacts with many, many people and one never knows where those contacts will lead. Lots of people are interested in the classes.

One of my biggest goals was to have a high class display. Never having done a show before, I was a little apprehensive about that. An artist friend was told to come over to see my display because it was so beautiful and professional looking. Someone else told me that it out-shined all the other displays and still another person told me it had a gallery feel. She mentioned that it was obvious that I had done many shows. (Nope, this is my first.)

I took pictures (since other shows want to see what your booth looks like.) I only had my small camera with me, so they are probably not the best. Tomorrow I'm taking my Nikon D40 and hopefully will have better pictures.

I would have shown you the pictures I took today, but I can't find my camera. I seem to have misplaced it. (Thought I knew where it was, but the heat fried my brain.) Hopefully I find it tomorrow or it's going to put a damper on my feeling of success. (Come to think of it.... I hope I can find my Nikon. Not sure where it is either!)

Monday, January 11, 2010

Tim McCreight Workshop

Yay!!!! Tomorrow I head to Pittsburgh for a workshop with the head Guru of metal clay, Tim McCreight. What a nice break in the middle of a snowy winter. It's a two day workshop on adding color to metal clay with a variety of mediums, like enamel, colored pencil, resin, etc. Tim is also teaching a Rio Grande Certification class the following three days. I really wanted to do that too, but the class filled up so fast. But, I am registered for the same class in June. Then on Friday night the local Guild is having a reception for him. He's going to make a little presentation that night too. Can't wait. I'll be sure to take pictures.

As I've said before, I love taking classes. I also think that anyone who teaches, should take classes. It helps us understand what problems our students may face.

I already have Level I and II Certification through PMC Connection, but each company's certification class is different and the more variety of instructors one has, the better.

The one problem I am going to have is keeping to my resolution of putting one item a day on my Etsy site. I'll have to put four on tomorrow or two tomorrow and three on Saturday. At any rate, I'll be averaging one a day. (Hopefully!)